
How to Make a Sourdough Starter from Scratch
In this post we’re going to walk through the steps of creating a sourdough starter from scratch
This is going to be a practice in patience but I whole heartedly believe you can do this!
How to Make a Sourdough Starter from Scratch
This post may contain links but they are not affiliate links. I am not in any sort of affiliate program at this time. They are links to things I actually use. All formulations shared on this blog have been formulated for personal use only, not for resale.
This is going to be a long post, so grab a drink, put up your feet & stay awhile. I will be giving you an extremely honest tutorial & this will be a practice in patience. We’re going to be moving on sourdough time, not our expectations.
Please expect the process of creating a starter from scratch to take you a few weeks to a month to get established & then once established it can take a few more weeks until it is matured. I’ve come across many tutorials that state the starter will be ready to use in 7 days but that is inaccurate & dangerous information, more on that later.
However once the starter is established you can start to bake with it but don’t be discouraged or surprised if the first few loaves you’re about to make don’t turn out as you might be expecting them to. Established starters can bake good bread, mature starters bake consistently good bread.
Let’s not get ahead of ourselves here. So, in this post we’re going to talk about the science of sourdough & what's really going on, types of flour including some gluten free recommendations, water options, why you need to learn to read the starter, starter maintenance suggestions along with some other notes & suggestions you might want to consider.
The Science of Sourdough, What’s Really Going On?
Sourdough is a symbiotic fermentation between wild yeasts called Saccharomyces cerisiae & Lactobacillus species of bacteria or lactic acid bacteria
Creating a sourdough starter is essentially harvesting the wild yeasts & lactic acid bacteria that are already present in the air around you. This is why sourdough starters made in different parts of the world & even different kitchens in the same cities can be slightly different from each other.
These wild yeasts consume the sugar in the flour which produces carbon dioxide which is what leavens (rises) the dough. These yeasts are slower but much hardier than the commercial strains of yeast you may be familiar with. Wild yeasts thrive in acidic environments, as the name suggests lactic acid bacteria create this perfect environment for our wild yeasts to thrive.
The Lactobacillus species, which are considered our beneficial bacteria, converts the sugars to lactic acid & acetic acid which is what gives sourdough its signature tang. The beneficial bacteria help preserve the bread while also inhibiting the growth or pathogenic or harmful bacteria.
What I find fascinating is this symbiotic relationship between wild yeasts & lactic acid bacteria is one of humanity’s oldest methods to leaven bread! We’re talking over 5000 years, dating back to around 1500 BCE in ancient Egypt
Battle between good & evil AKA beneficial vs pathogenic bacteria
I know that sentence sounds a bit intense but that’s kind of what is happening once our starter gets going. I’ll explain what I mean.
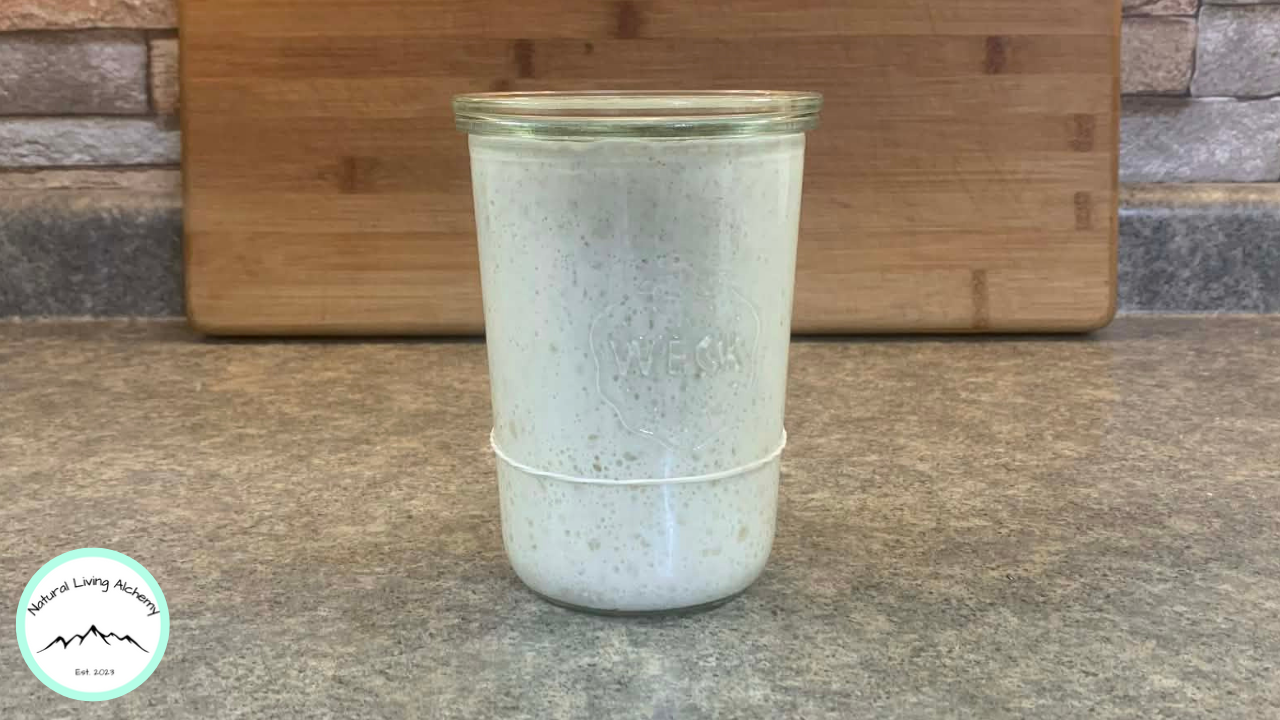
Once things start to get going the wild yeasts & beneficial bacteria have started to do their thing something interesting starts to happen. You notice bubbles starting to form along the sides & the top of your starter. You even observe that the starter has risen & grown really big. Maybe you even start to get really excited that you are this much closer to baking bread.
Then for the next few days nothing happens, no growth, no rise, no expansion. This is when a lot of us, myself included, have given up & quit but you need to know that every single starter will go through this stage.
This first rise, which is referred to as false rise, happens when a strain of bacteria called Leuconostoc bacteria causes the starter to rise.
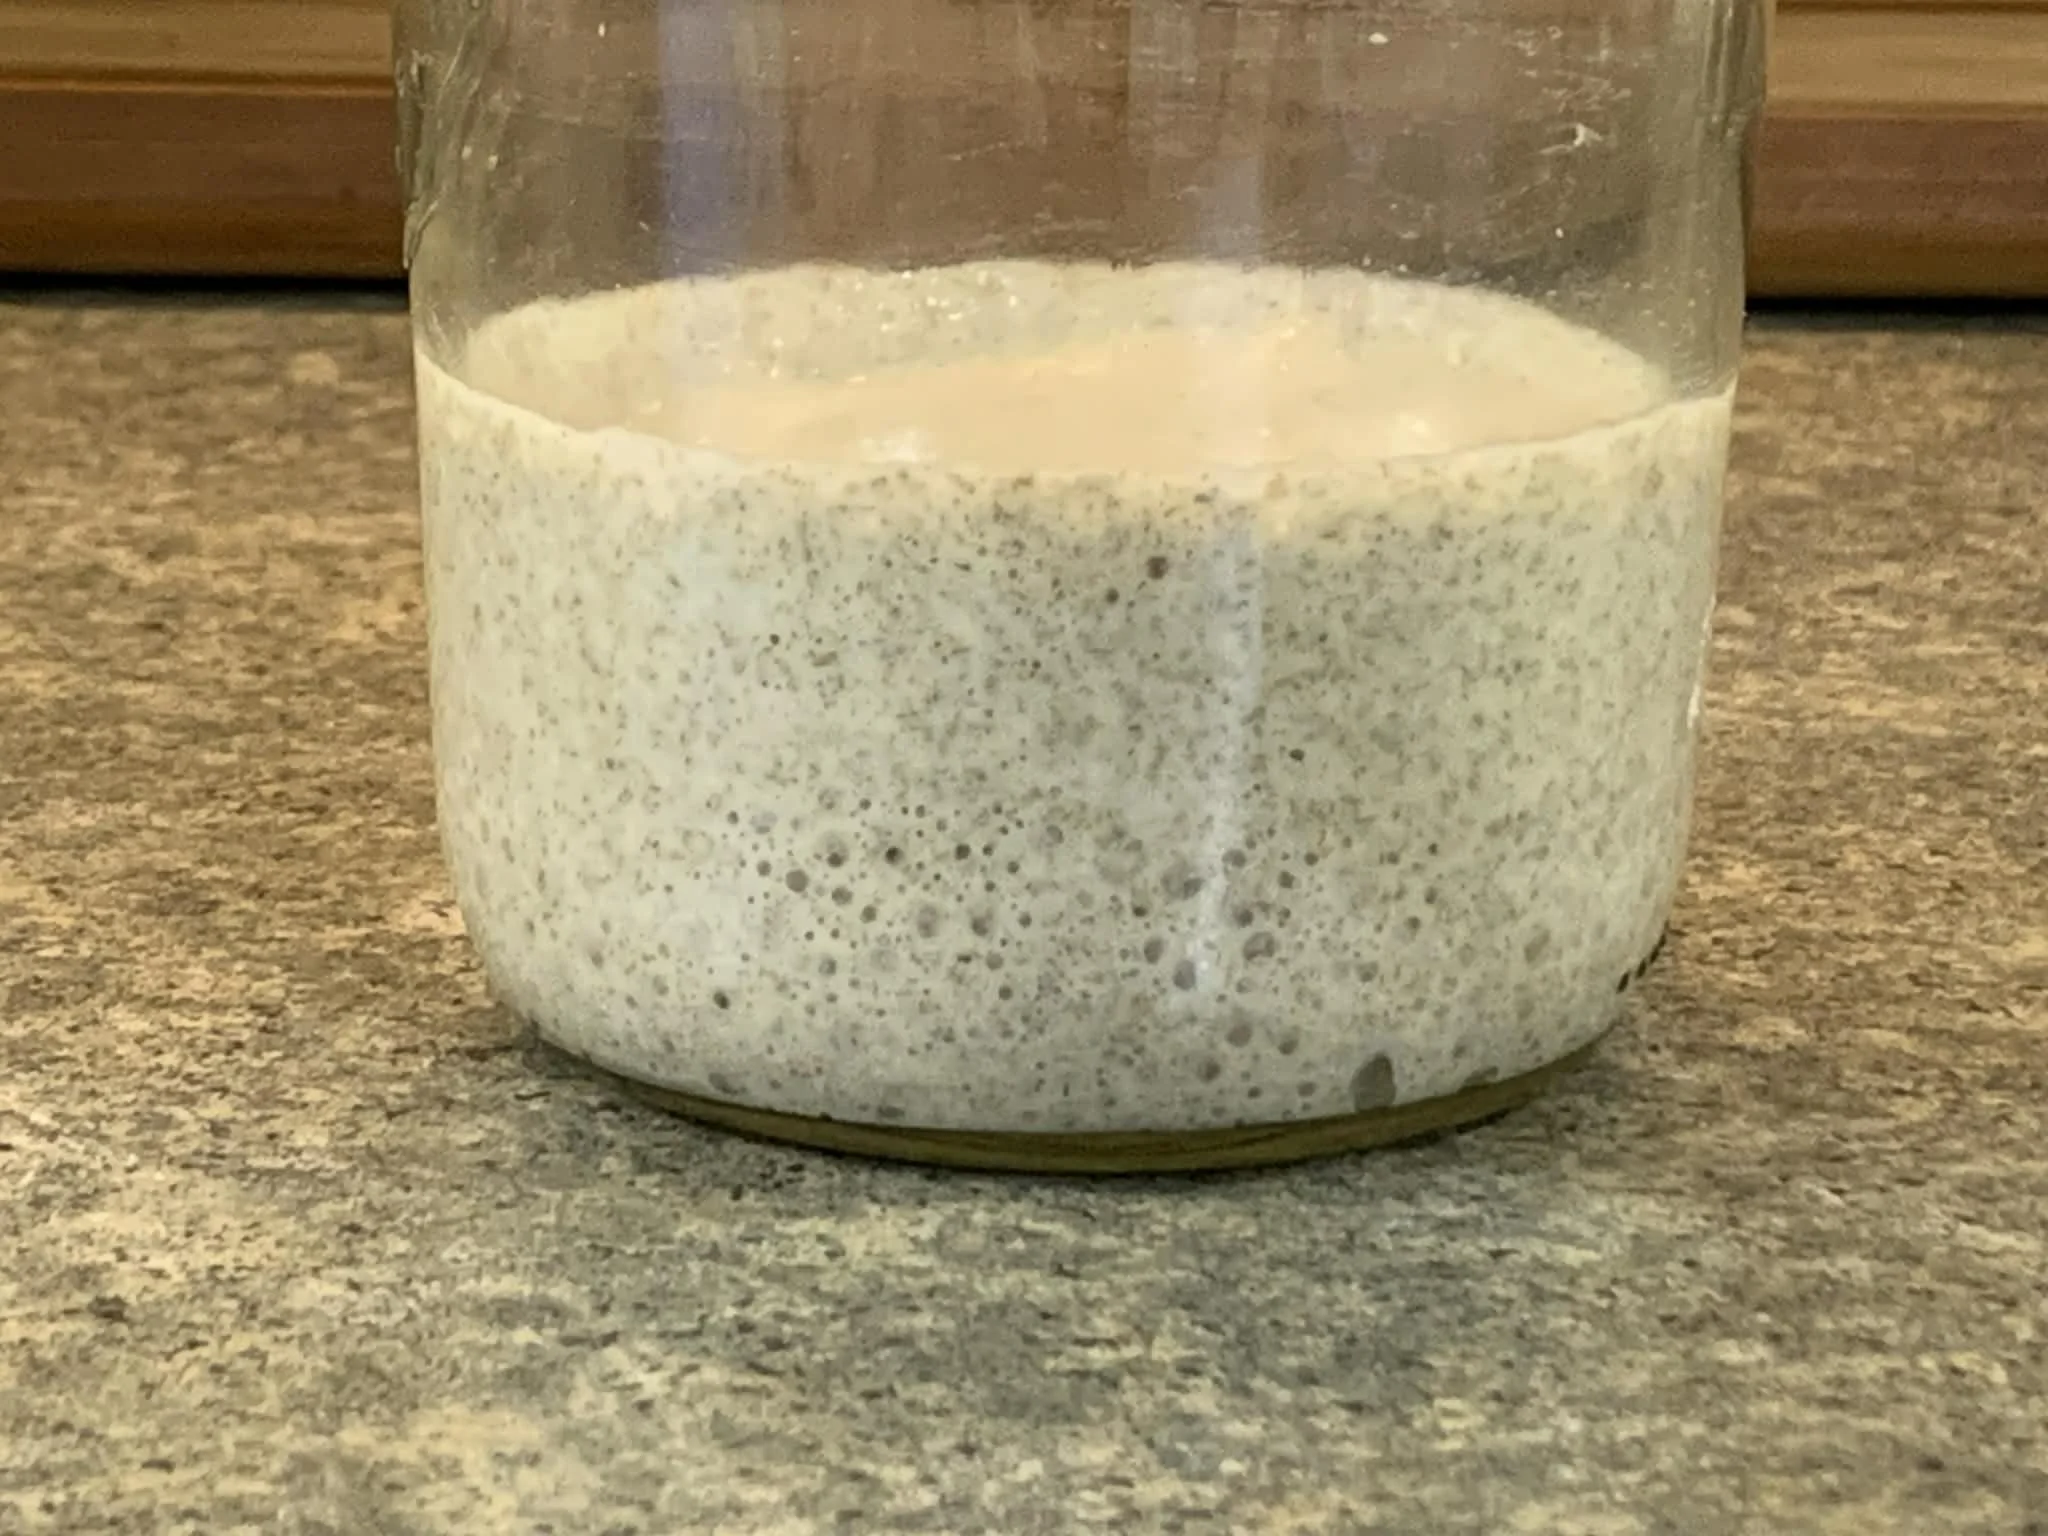
Image of false rise. This was the first burst of activity from our starter as the beneficial bacteria & pathogenic bacteria balance themselves out. Expect a period of inactivity to follow
The thing with sourdough is we want the yeasts to rise the starter not the bacteria.
This is why I jokingly call it the battle between good & evil, it’s literally the beneficial bacteria AKA the good guys overtaking the pathogenic bacteria AKA the bad guys. What’s happening during this period is actually a bit of a balancing act as the beneficial bacteria over take the pathogenic bacteria.
I will give you fair warning, during this time your starter is going to stink. Expect a combination of dirty gym socks with a hint of acetone or something along these lines.
One of the best suggestions I can give you is to start using the concept of organoleptics which is a fancy way of saying to use all your senses. Your sense of smell will give you a lot of information regarding the state of your starter throughout its life. For example your sense of smell can tell you if your starter is wanting to be fed
Here’s a handy chart to give you an idea of what I mean
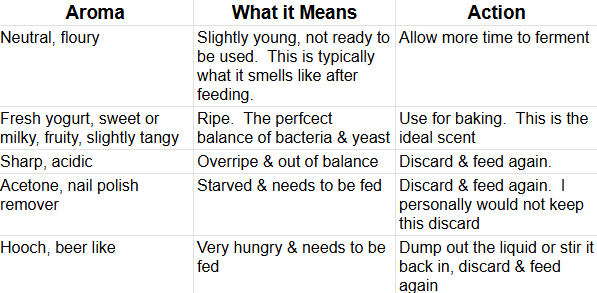
Aroma chart for sourdough starter
Hooch is a brownish alcoholic liquid that forms on top of unfed or hungry sourdough starter. It is a completely natural byproduct of fermentation. It only seems to show up in a hungry starter once all the flour & water have been used by the starter. You can either stir it in or dump it out. It is harmless but may end up affecting the flavor of the starter when stirred back in.
Learning to read the starter is the best thing you can do. Use as many senses as you can.
We’ve already talked a little bit about smell.
You can always taste your starter & see what’s going on. I’m not saying to eat a bunch of starter as we shouldn’t be consuming raw flour but you can put a bit of starter on your tongue & see what the flavor is like. You don’t swallow the bit of starter by any means, but the flavor will tell you just as much as smelling it will.
Use your eyes to determine if your starter is wanting to be fed or used to bake. We are looking for a combination of signs, not just significant rise in the jar.
Things to look out for would be:
Doubled in height
Bubbles all throughout, along the top & sides
Sour but pleasant aroma
Somewhat elastic consistency. The more white flour in the sourdough starter the more elastic it generally is.
If your starter has most or all of these things going on I would say yes it’s ready to go & it’s time to proceed by either creating a levain so you can bake or it’s at peak & should be discarded & fed.
To learn more about baking sourdough bread check out this post HERE
Now that you’re equipped with a bit of knowledge on what to expect let’s make our starter
Flour Types
One thing you will rarely see me do is talk about what brand of anything you need to be using, I may make suggestions here & there but I don’t know what you have access to.
What I’m actually concerned with is flour types rather than brands. Just know different brands of the same type of flour can & do act differently as different flours absorb water at different rates. Adjustments to the water portion may need to be made depending on your flour if you choose a different brand.
There is nothing wrong with using one type of flour & then switching it to a different one if desired once the starter is active as each type of flour brings something different to the table.
Unbleached → bare minimum of what you will require. This flour can be relied on for consistency & general availability
Whole grain flour → ferments quickly because it contains more nutrients than unbleached
Rye flour → extremely starter friendly & speeds up fermentation. Be sure to use dark rye which is the whole grain version. Light rye won’t work as well in this process
Blend of 50% AP or bread flour + 50% whole grain → an ideal blend if you don’t want to use all AP or all whole grain. A blend is what I’m going to recommend & if you do use one, mix up a moderate amount in a container so you always have some on hand.
Just because you begin this journey with one flour doesn’t mean you always have to stick with that flour. I’m going to suggest at least doing a blend of 50-50 of AP & rye flour for the first few days then you can switch it up once the starter is active. Remember active doesn’t mean ready to use.
There are basically 3 stages to creating a sourdough starter
Active. The starter has become active, this is the first step
Established. The starter is now ready to be used but is still weak & just needs more feedings
Mature. The starter is now strong & will create consistent bread if kept happy. A mature starter might regress slightly & become weak but all you need to do to remedy that is more feedings.
If you are wanting to use gluten free flour here are some suggestions. Keep in mind I am not a gluten free baker but these ones will work wonderfully
Brown rice flour
Sorghum flour
Buckwheat flour
Teff flour
Millet flour
Simply choose a single flour or blend. Keeping in mind that brown rice flour is a common base for gluten free sourdough.
Gluten free flours will absorb water differently, so you may need to adjust your water until you get to the desired consistency. Be sure to write down the amount of water used so you always consistently feed the starter. Sourdough generally likes consistency.
Water Options
Here are some water options to choose from
Tap water. This is fine as long as it is not heavily chlorinated & does not contain any chloramine. There are kits out there you can use to test what is in your water. You could also just try to get this information from where you get your water from.
Chloramine is a chemical compound of chlorine & ammonia which is commonly used as a disinfectant in water treatment. It is a less aggressive chemical than chlorine & helps to prevent bacterial growth in water systems.
To remove chloramine from the water reverse osmosis is the best method, however reverse osmosis methods will remove EVERYTHING including some of the minerals that are naturally found in water that we require for this process. If this is the only water you have, consider adding a pinch of high quality mineral salt to reinstate some of those missing minerals.
To remove chlorine you can allow a container of water to sit for 24 hours & allow the chlorine to evaporate, this method will remove 60-99.999% of the chlorine.
Using activated carbon filters may help reduce the amount of chloramine & chlorine in water. You could always just use the tap water & see if it's going to work or not. If nothing happens after a week then I’d consider starting over & with a different water suggested
Well water. This has a natural mineral content which can be beneficial to sourdough. This is the water I currently use for all of my baking as I happen to be on well water where I live. Not all well water is the same so your best bet is to try it out & see what happens.
Filtered or spring water.
Another thing to keep in mind when it comes to water is that hard water is better than soft water because hard water contains minerals such calcium & magnesium which our wild yeast & beneficial bacteria love.
So as you can see you have a few options but one type of water you need to avoid is distilled or purified water. The thing is we need our water to be alive for this process to work properly & distilled water isn’t alive as it’s been stripped of its nutrients. Distilled water isn’t even intended for daily use as it can lead to mineral deficiencies & electrolyte imbalances.
Now is the time to make your choice on what type of flour & water you will be using. Once the starter is active you can certainly change things up if desired & see if there is an improvement or a regression in the starter.
How to Make a Sourdough Starter from Scratch
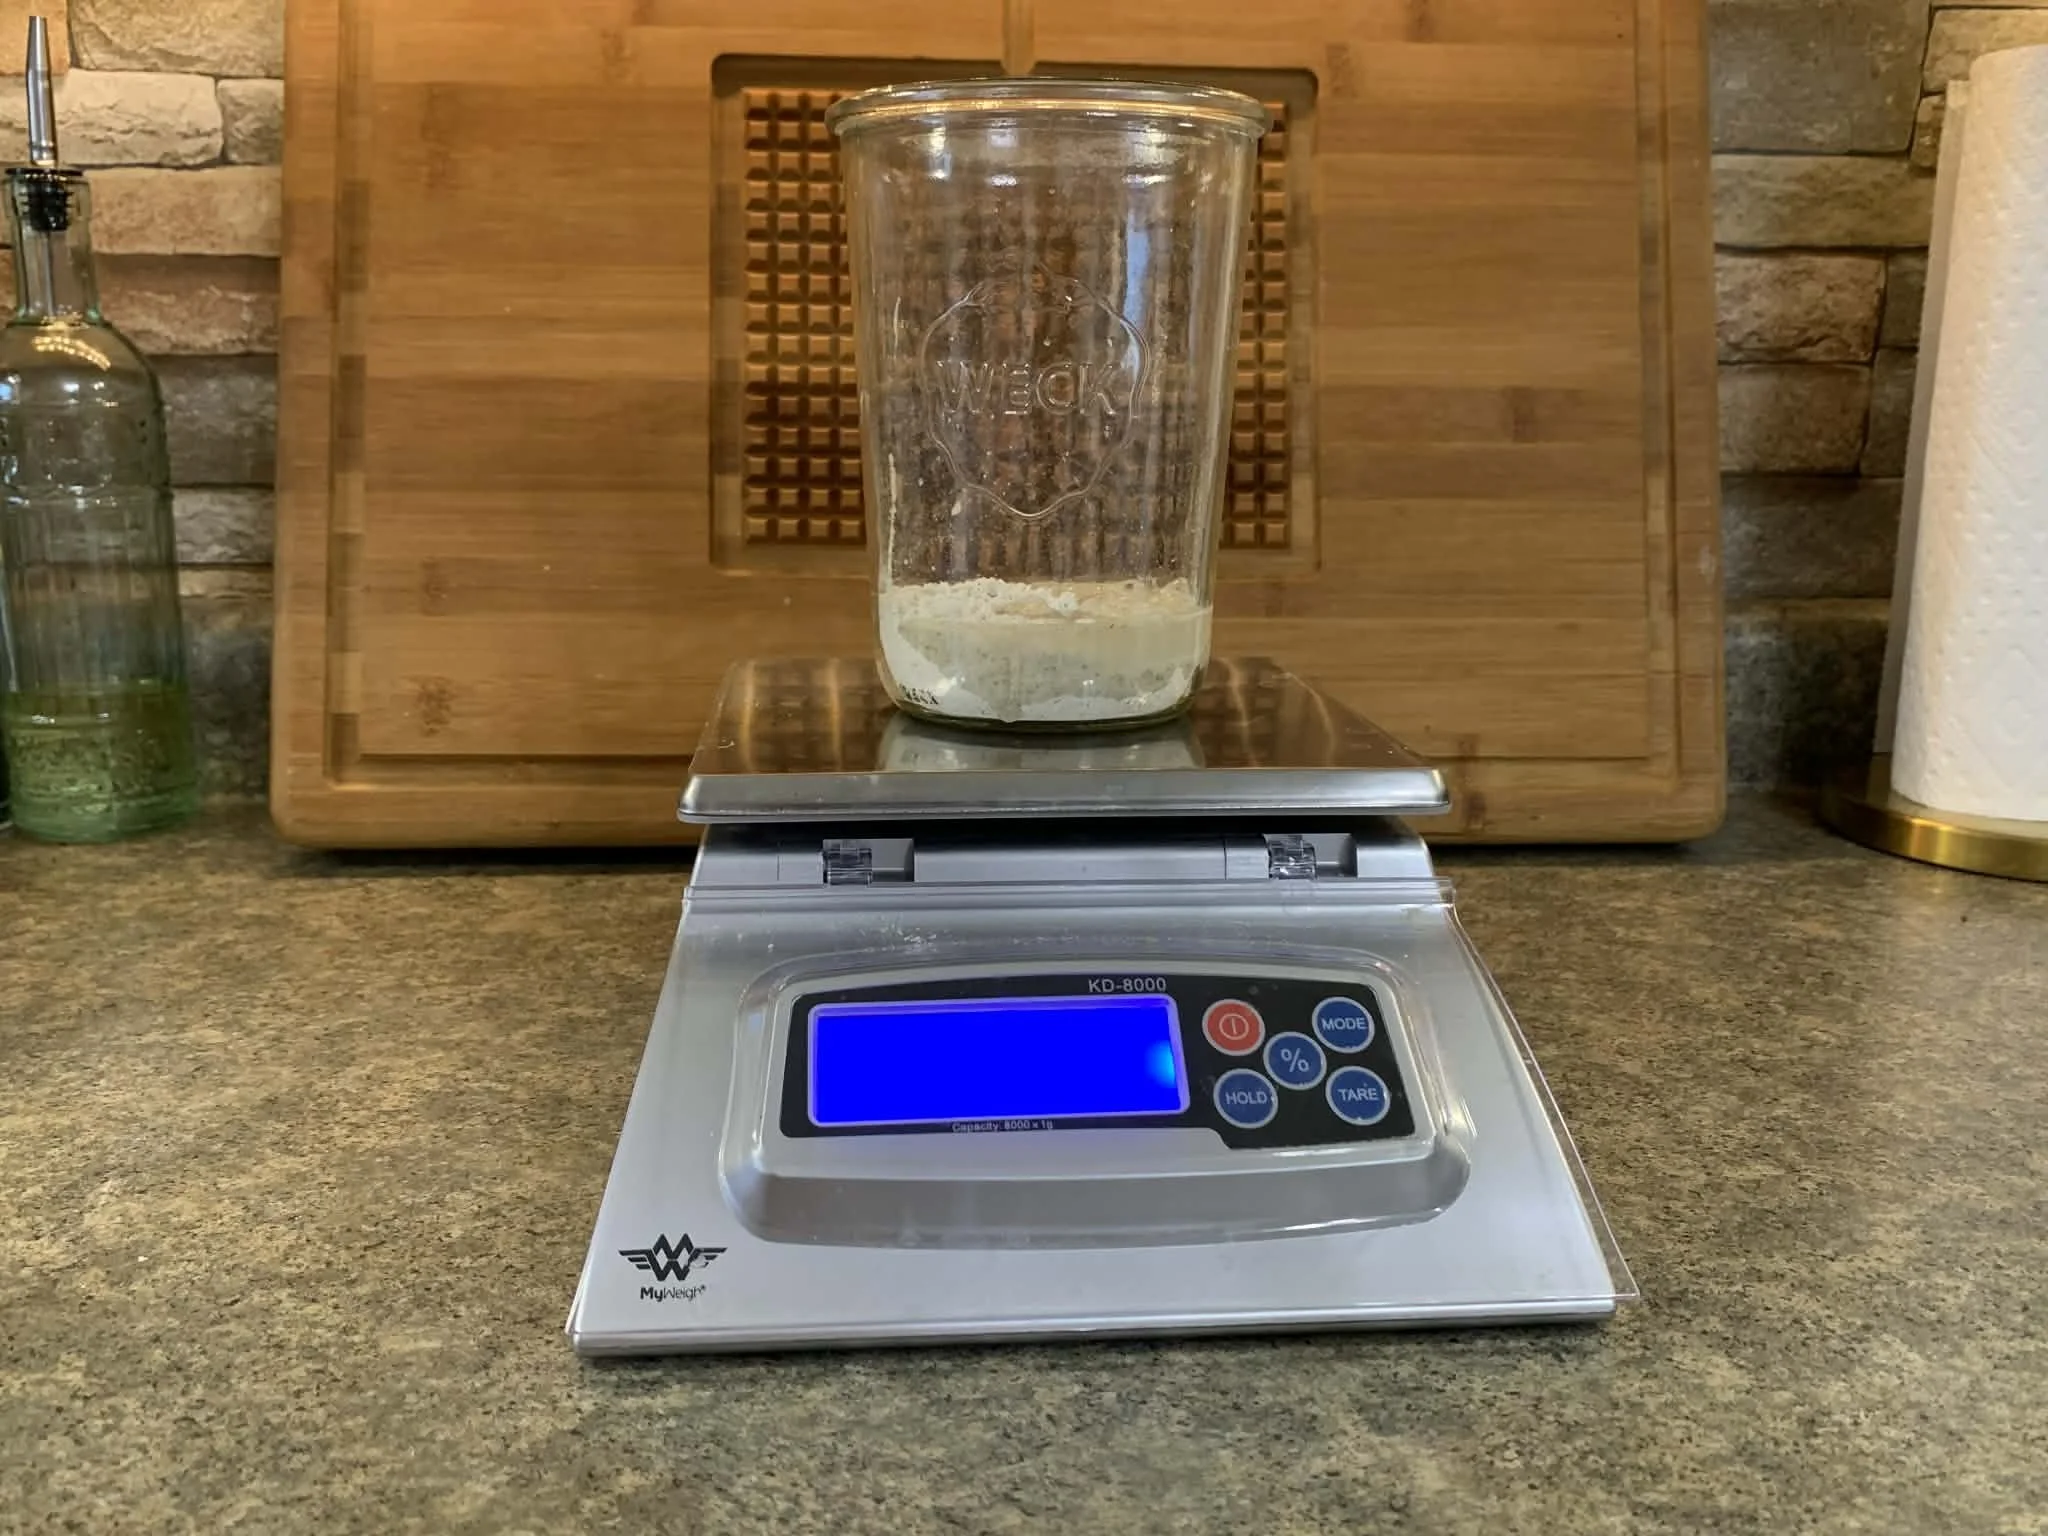
Always use a digital or kitchen scale to ensure you are discarding & adding the appropriate amount of each ingredient. Your starter will thank you in the end.
Equipment:
1-2 Clean glass jars with a non-airtight lid
Kitchen scale
Spoon or spatula for stirring
Rubber band to track the growth of the starter
Thermometer
Optional: pH meter
Ingredients:
Flour
Water
Method:
Determine what flour you are going to be using. If making a 50-50 blend mix up 150g of AP & 150g whole grain mix well & store it in a sealable container
Place a jar on the digital scale & weigh out 30g of flour. Add 30g of water to the jar & stir thoroughly making sure the flour is fully hydrated & there are no dry clumps remaining. If you are only using one jar make sure to write down the weight of the jar when empty so you always know how much you will need to discard to in the future
Cover the jar & place in a warm spot (72-72F). Leave it alone & untouched until you see bubbles forming. Expect this to take 1-3 days or more. If nothing has happened after a week I would start the process over.
Place a clean jar on the scale adding 30g of starter, 30g of flour & 30g of water. Or if you are only using one jar, discard down to 30g then add 30g of flour & 30g of starter. This is our 1:1:1 feeding ratio we will be following for a while during this process. Throw away the leftover starter, it is not ready to be used & therefore has served its purpose. When discarding my starter I put the discard on a paper towel or napkin then throw out the paper towel. I prefer to avoid holding my starter over the garbage can to discard. Whatever you do, DO NOT dump the discard down the sink.
Repeat the 1:1:1 feeding every 24 hours until you see the starter begin to rise & fall. This step may take a few days or weeks. Be prepared for the false rise which is always followed by a period of inactivity. Keep feeding every 24 hours regardless of the amount of activity. Even just one bubble is a good sign & means it's still alive.
Once the starter begins to rise & fall consistently, increase the feedings to twice a day, 12 hours apart if possible. Use the same ratio of 1:1:1. Continue this step until it doubles reliably within 4-6 hours. This step can take 1-4 weeks.
Perform the float test, while it does have its limitations it is a way you can gauge if your starter is ready to be used or not. Drop a small amount of starter in a glass of water, if it floats it’s ready to go, if it sinks it needs more time or to be fed. If you have a pH meter, use it at this step, we want to see a pH of 4-1 or below which means that you have an environment where pathogenic bacteria can’t survive. Once your starter has reached this point you can start to keep your discard if desired. If you haven’t named your starter already, do so now.
Once your starter is established you will need to decide how you want to maintain it.
Starter maintenance:
The biggest thing to take into consideration is different flours absorb water differently.
Determine if you want to change your flour mixture to 75% AP/bread flour to 25% whole grain or use 100% AP, bread flour or whole grain. Feed your starter at one of these recommended ratios I’m about to share until you get to know your starters preferences to how it wants to be fed.
1:5:5 is recommended for once daily feedings. There needs to be 5 times more flour & water than starter
Standard size starter: 30g starter, 150g flour, 150g water
Tiny starter: 5g starter, 25g flour, 25g water
1:2:2 is recommended for twice daily feedings. There needs to be twice the amount of flour & water than starter
Standard size stater: 30g starter, 60g flour, 60g water
Tiny starter: 10g starter, 20g flour, 20g water
The amounts I’m giving are suggestions so make them work for you. A tiny starter is generally 50g total or smaller.
I’ve personally had the best luck using AP rather than bread flour for maintenance, but if you didn’t feel like having multiple types of white flour I’d use bread over AP.
These ratios are an excellent place to start. But just know that each starter will be unique in its flour & water preferences. I’d even go so far as to say each starter develops its own personality. I currently have 3 different starters & this is something I’ve observed. They all live beside each other on my cupboard but they each prefer different flours & ratios.
You do not require more than 1 starter, things just kind of got away on me.
I first revived Sandy Sauer-dough, my San Francisco sourdough starter on the YouTube channel. I was way too impatient when trying to create my own & wanted to start baking ASAP
My second starter is named Ryelene Sauer-dough. She was created & maintained mainly with rye flour.
My third starter, Jane Sauer-dough is the one I created in this post. I have no plans of keeping this one & I’m looking for a good home to pass her along to once she’s fully matured.
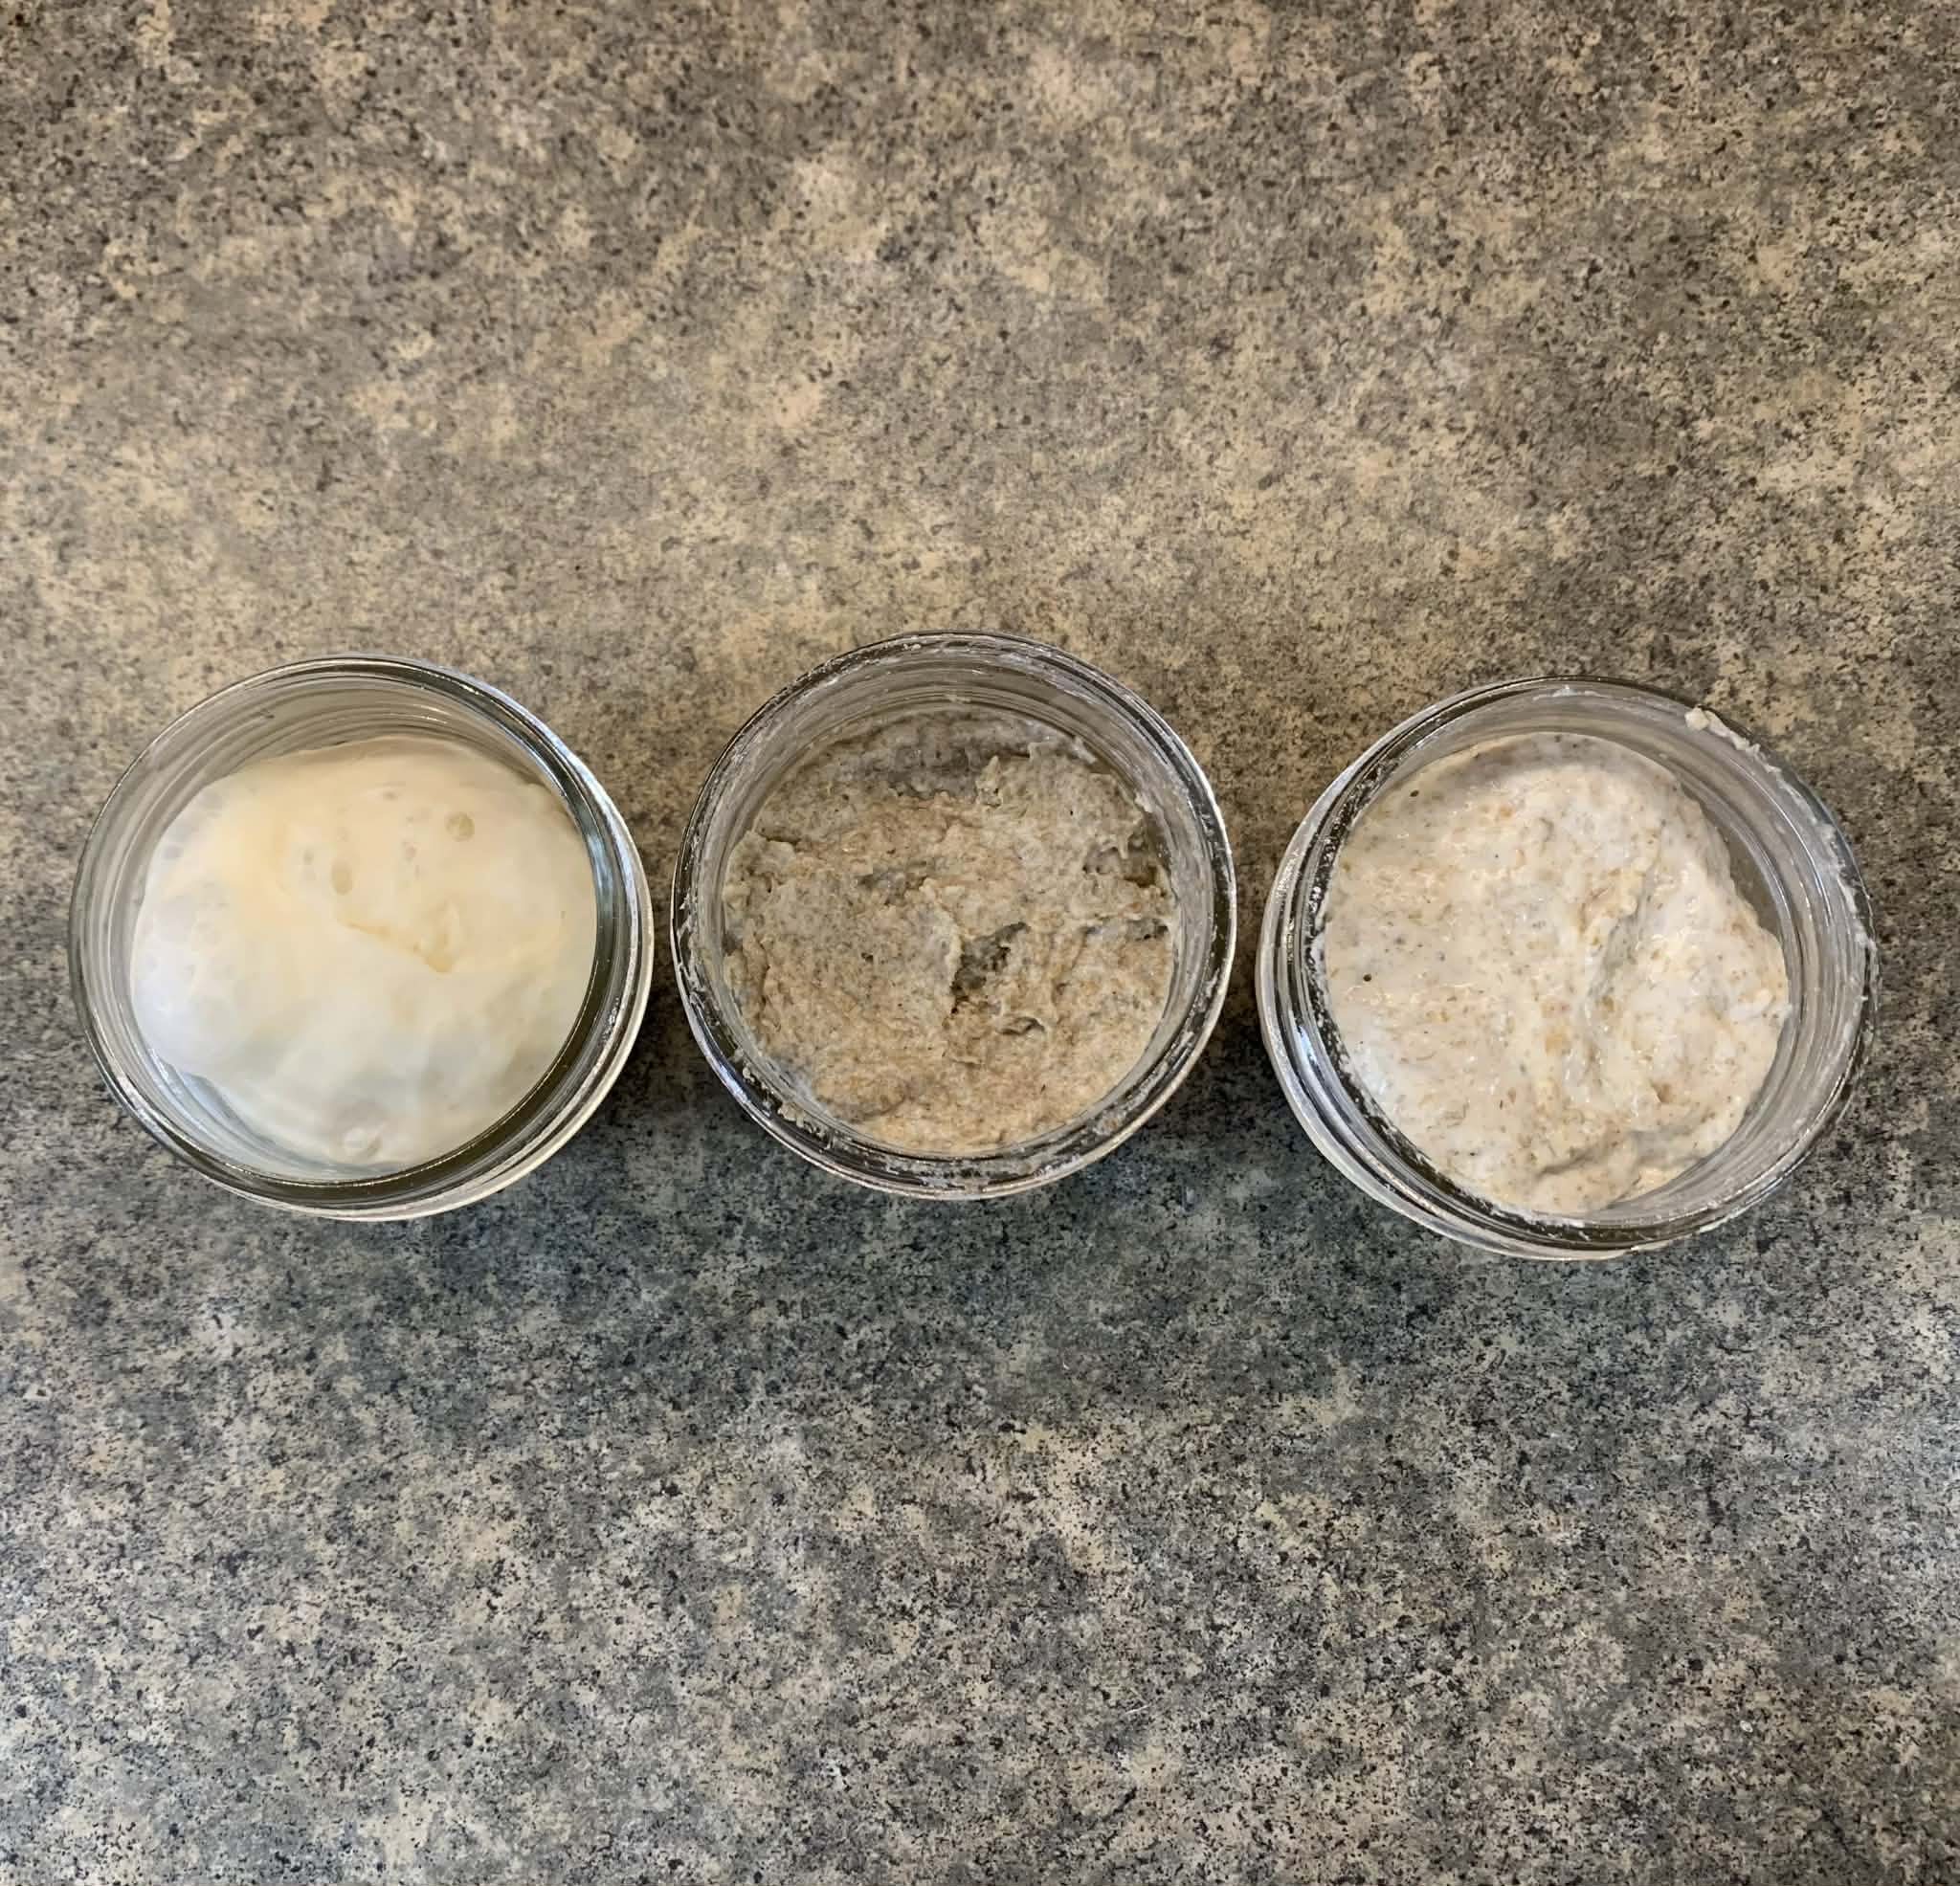
Starters left to right: Sandy (stiff starter fed with 100% AP), Ryelene (semi-stiff stater fed with 75% Rye & 25% AP), Jane (liquid stater fed with 75% AP & 25% Rye)
They were all fed 8 hours prior to this picture being taken & they will get fed again soon
If you’re wondering why the weird last name on my starters, my husband's last name is Sauer (pronounced sour) so I thought I’d have some fun with the names.
Anyways, once your starter is established you will be ready to bake your first loaf of bread. Be warned that an established starter isn’t necessarily a mature starter so if your first few loaves of bread turn out less than desired it may just mean your starter is weak & just needs some more feedings.
Once it's been created, you’ve figured out how you want to maintain it, what about storage?
Starter storage
I will start off by saying the fridge is not my ideal or recommended way of storage. Yes it is something that bakers all over the globe do successfully so if that’s what you want to do I’m not stopping you.
The reason why I don’t store it in the fridge is because I don’t see a point in making my starter all sleepy, essentially placing it in a state of suspended animation where it will eventually become unbalanced & weakened. With that being said, if I was to go on holiday I would give my starter a huge feeding & then put it in the fridge. A bit of rehab might be in order depending on how balanced or acidic it’s become
Storing sourdough starter in the refrigerator is typically a method used by those who only bake once a week or so. If this is the method you are choosing, you should give your starter 2 but ideally 5 feedings before using it to help wake up the yeasts from their dormant state & balance the acidity.
Following this method you would want to still feed your starter once per week. I'd do a hefty feeding, allow it to sit at room temperature for 1-2 hours before placing it in the refrigerator.
If you want a happy & healthy starter all the time, just keep it on the counter. Even with my 3 starters which I feed twice a day it only takes me a total of 20-30 minutes, believe me I have that much time to spare to keep my starters balanced & strong. That’s just 10-15 minutes in the morning & 10-15 minutes in the evening, I’m sure you’re not that busy you couldn’t find the time if you wanted to.
Sourdough discard
I’m not sure this would be a proper guide if I didn’t share what to do with the discard once your starter is established & the discard deemed safe to use.
This may or may not come as a shock but I do not keep sourdough discard. The last thing I need in my fridge is another jar of something I may or may not use.
The way I like to view it is that the flour & water have already done their job in feeding the starter. I prefer to use fresh levain in any recipe as opposed to old flour & water that has been already spent.
A levain is an offshoot of a sourdough starter that you use with the intention of baking a loaf of bread. This is different from a sourdough starter which is kept for continual use. They are similar, but my dyslexic mind likes to keep the words separate so I don’t get confused.
If you do decide to keep sourdough discard, it’s only recommended to keep for 5 days before it should be thrown out. You can freeze it but why do you need that much? If you feel strongly about it being a waste, maybe there’s a belief that is no longer serving you that is calling the shots that is wanting to be addressed.
Notes & Suggestions:
Expect this process to take 9-11 days minimum to 2 weeks or longer. I say at least 9 days because what I’ve learned is that is typically the minimum amount of time you need for your starter to become safe to use. It’s given enough time for the bacteria, yeasts & acid to balance out. I’m personally not in a hurry to potentially consume pathogenic bacteria in my bread, but that’s just me, I’d rather be safe than sorry.
70-75F is an ideal temperature to encourage activity. If you want a more acidic or sour flavor keeping your starter around 80F will produce this type of flavor profile
You don’t need to be too concerned with temperature as your starter will adjust to the ambient temperature in your home. You could consider putting the starter up high, because heat rises on cold days in your kitchen. Be inventive & follow your instincts
A second jar will make things a lot easier but if you only have one jar you will be using, consider writing the weight of the jar on the bottom so you know exactly how much you need to discard.
Use a kitchen scale to ensure you are discarding & adding the appropriate amount of ingredients. You can eyeball it but a scale will provide more consistency & sourdough starter thrives off of consistency.
To clean your jar wipe out the jar with a paper towel & then rinse with hot water
Avoid using antibacterial soap on your equipment because any residue left behind from the antibacterial soap can interfere with your developing starter
Always stir vigorously because you want to introduce oxygen into the environment.
Consider keeping a tiny starter. Build it up as needed
Different types of flour will absorb water differently
The more liquid your starter the more acid will be produced.
For more sourness use white flour only
Once your starter is matured & a couple months old you may want to dehydrate some & create a bit of an insurance policy. I’ll be covering this in a future post so keep an eye out!
Always remember as long as you have even one bubble, the starter is still active.
If you changed something & your starter isn’t behaving as expected, go back to the last step & be patient.
Don’t let my info-dumping overwhelm you, as an autistic person it is one of my love languages after all. Come back to this post or the video tutorial as often as you need to.
If you have any questions regarding your starter, comment down below & I can help you troubleshoot.
Until next time, may you find Peace wherever you are!
Watch the video & tutorial HERE
Image of linked YouTube thumbnail