
Beginners Guide to Baking Sourdough Bread
In this post we are walking through the steps on baking your first loaf of sourdough bread.
Even if you’re already a seasoned baker you may still learn something new!
Beginners Guide to Baking Sourdough Bread
This post may contain links but they are not affiliate links. I am not in any sort of affiliate program at this time. They are links to things I actually use. All formulations shared on this blog have been formulated for personal use only, not for resale.
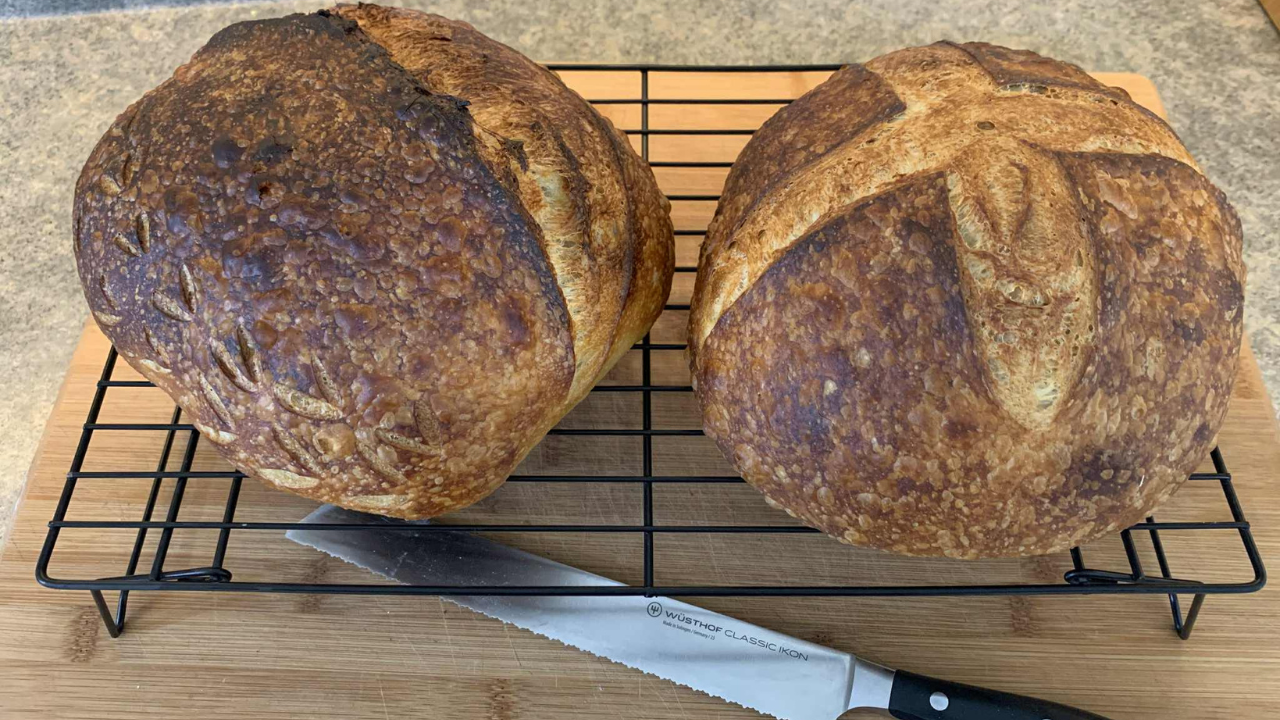
Today I’m going to be sharing a basic sourdough recipe that will make two loaves. I’ll be showing you how to shape the coveted boule shape & my personal favorite batard shape.
Be sure to come back next week where I will be sharing a pumpkin sourdough recipe, just in time for Canadian Thanksgiving
Before we get to baking our bread I want to go over a few terms you may come across during your sourdough journey as well as some suggestions on the “best” ingredients.
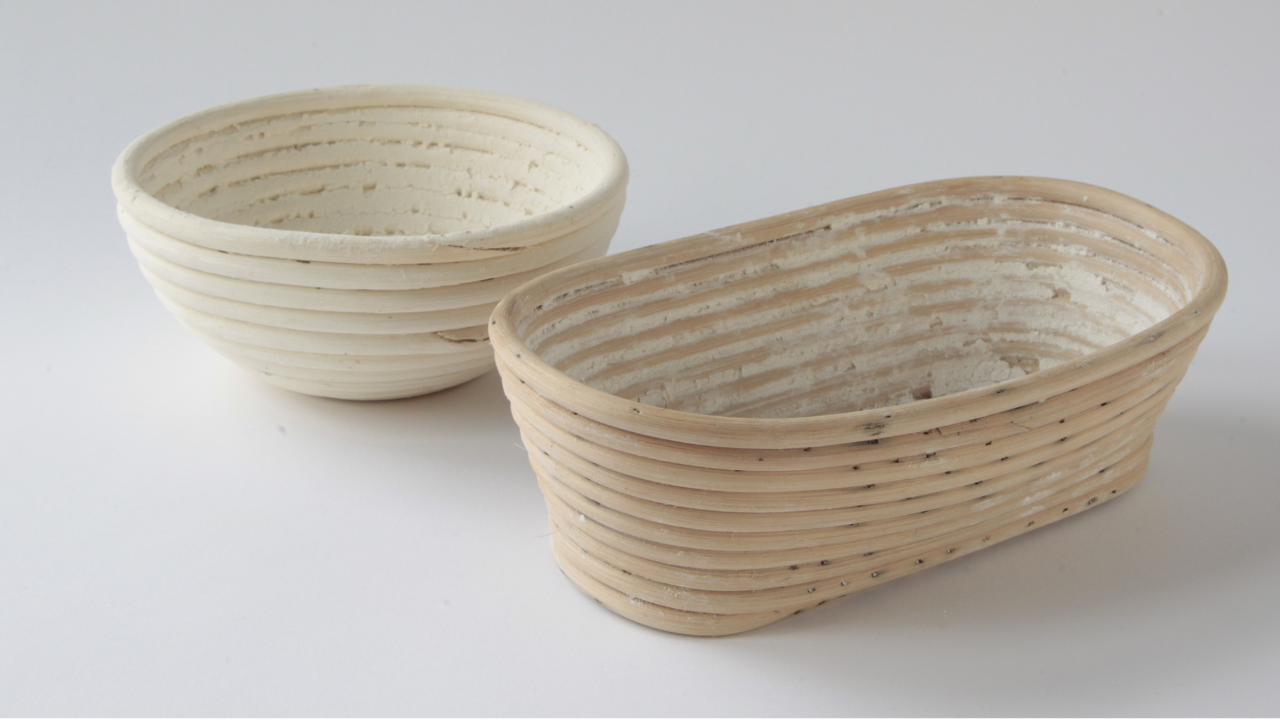
Banneton/Proofing Baskets
Banneton: A type of basket used to provide structure for sourdough bread during the proofing stage. They come in boule or batard shapes. Different types of bannetons will affect the texture & the crumb of the bread.
Boule: A round shape of sourdough bread
Batard: An oval or oblong shape of sourdough bread
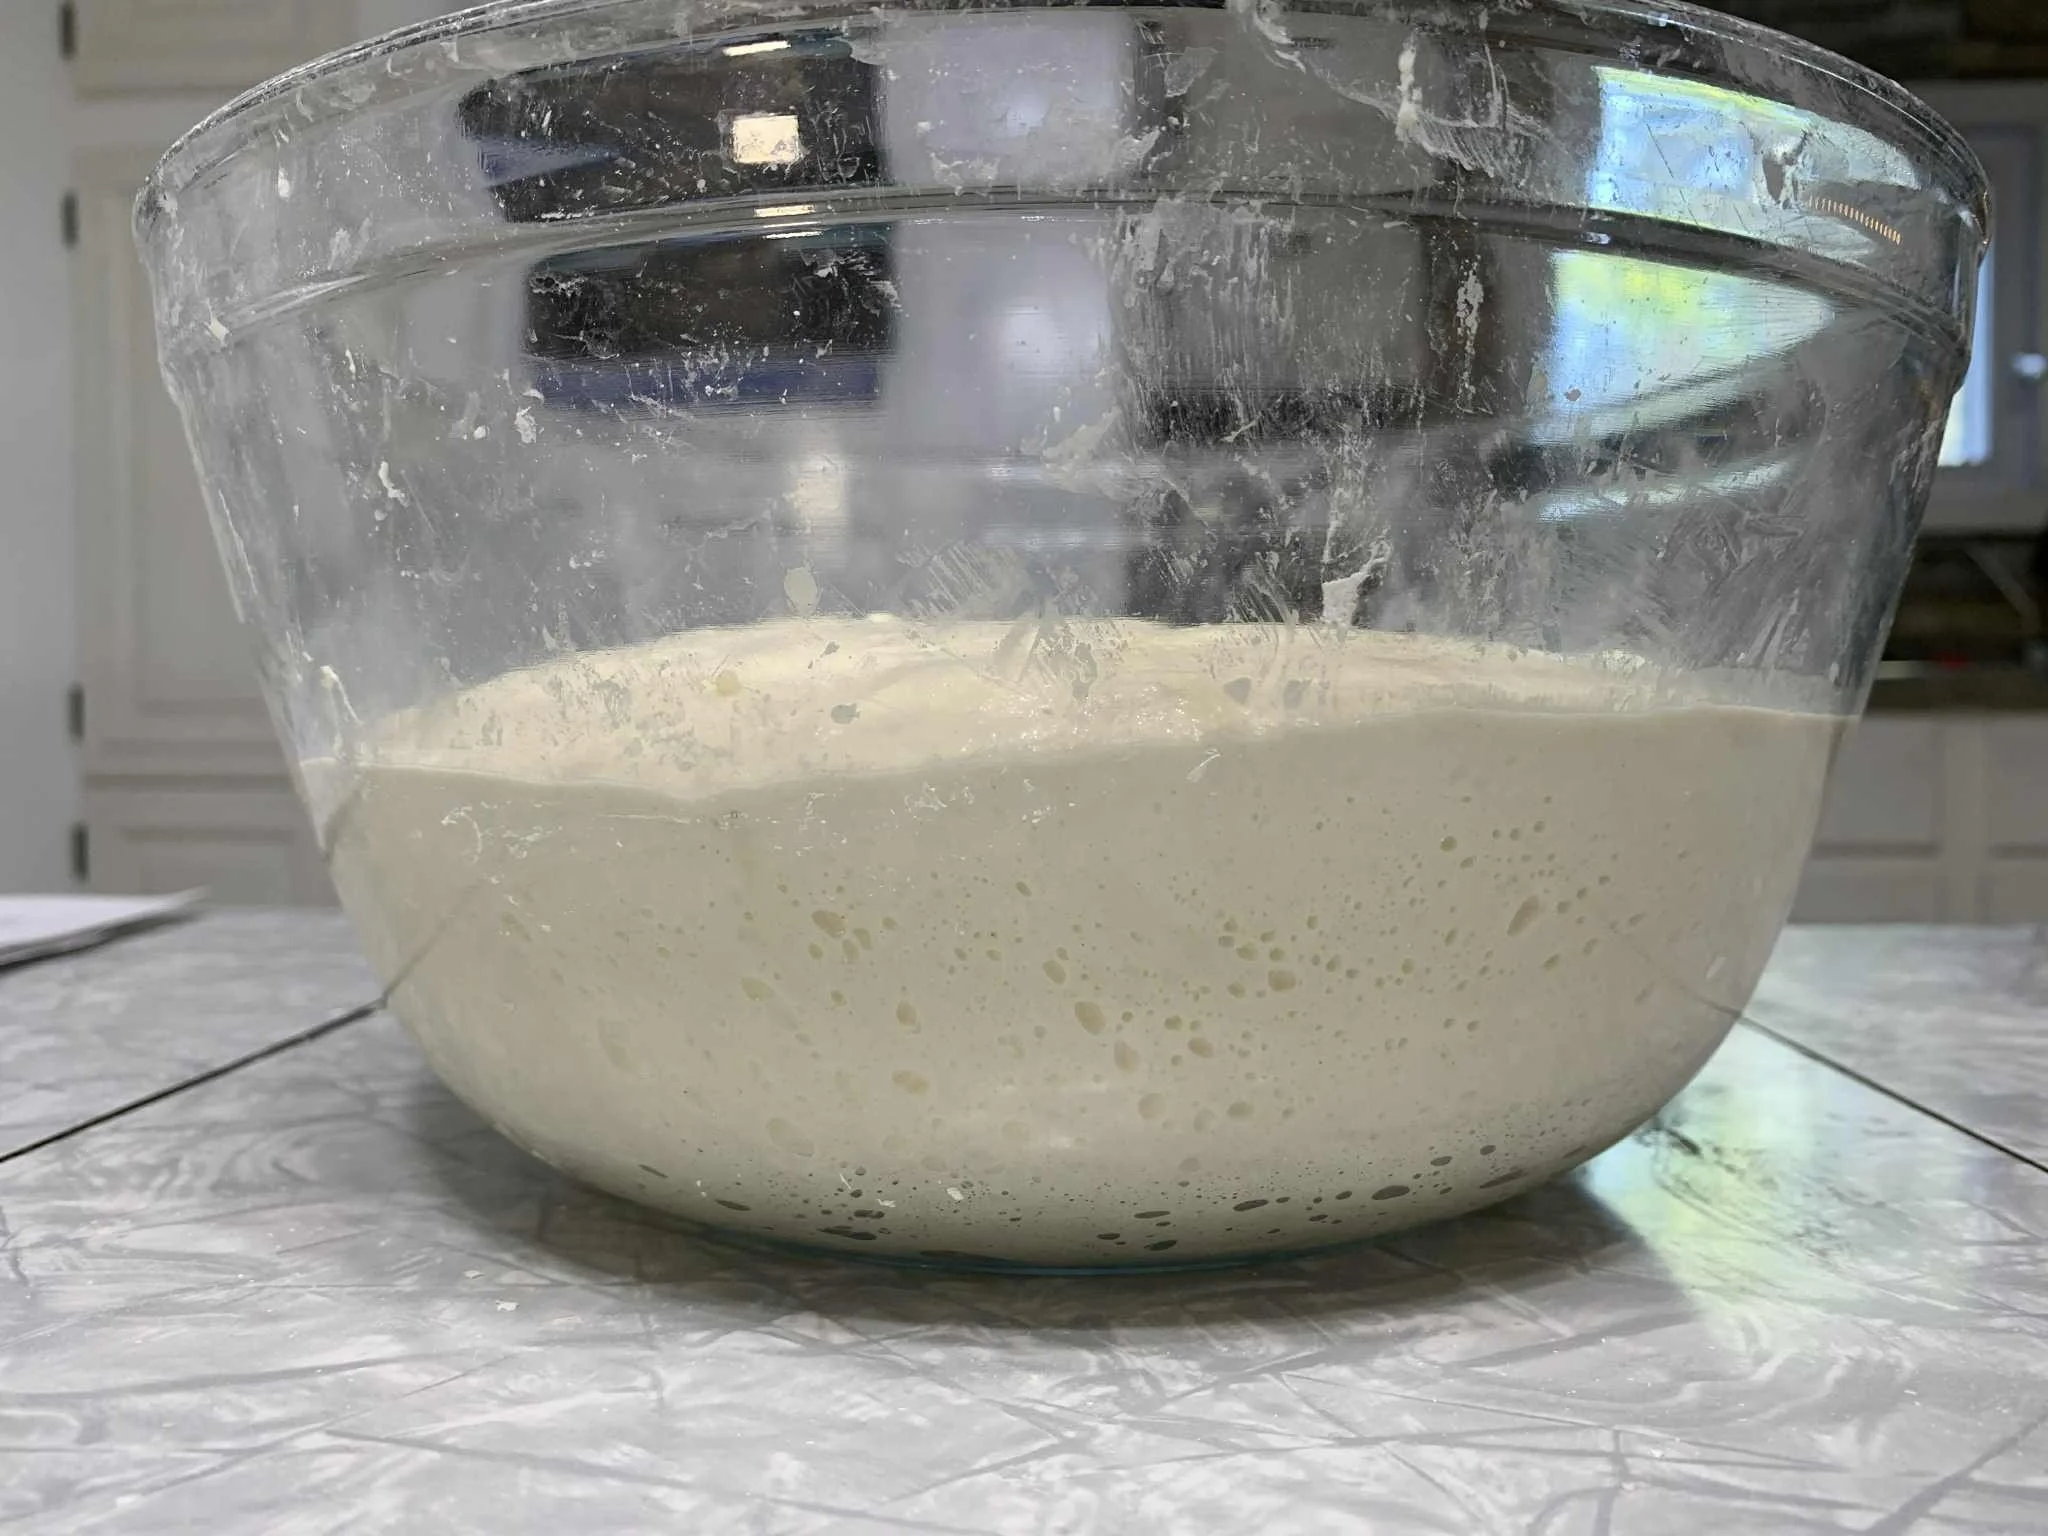
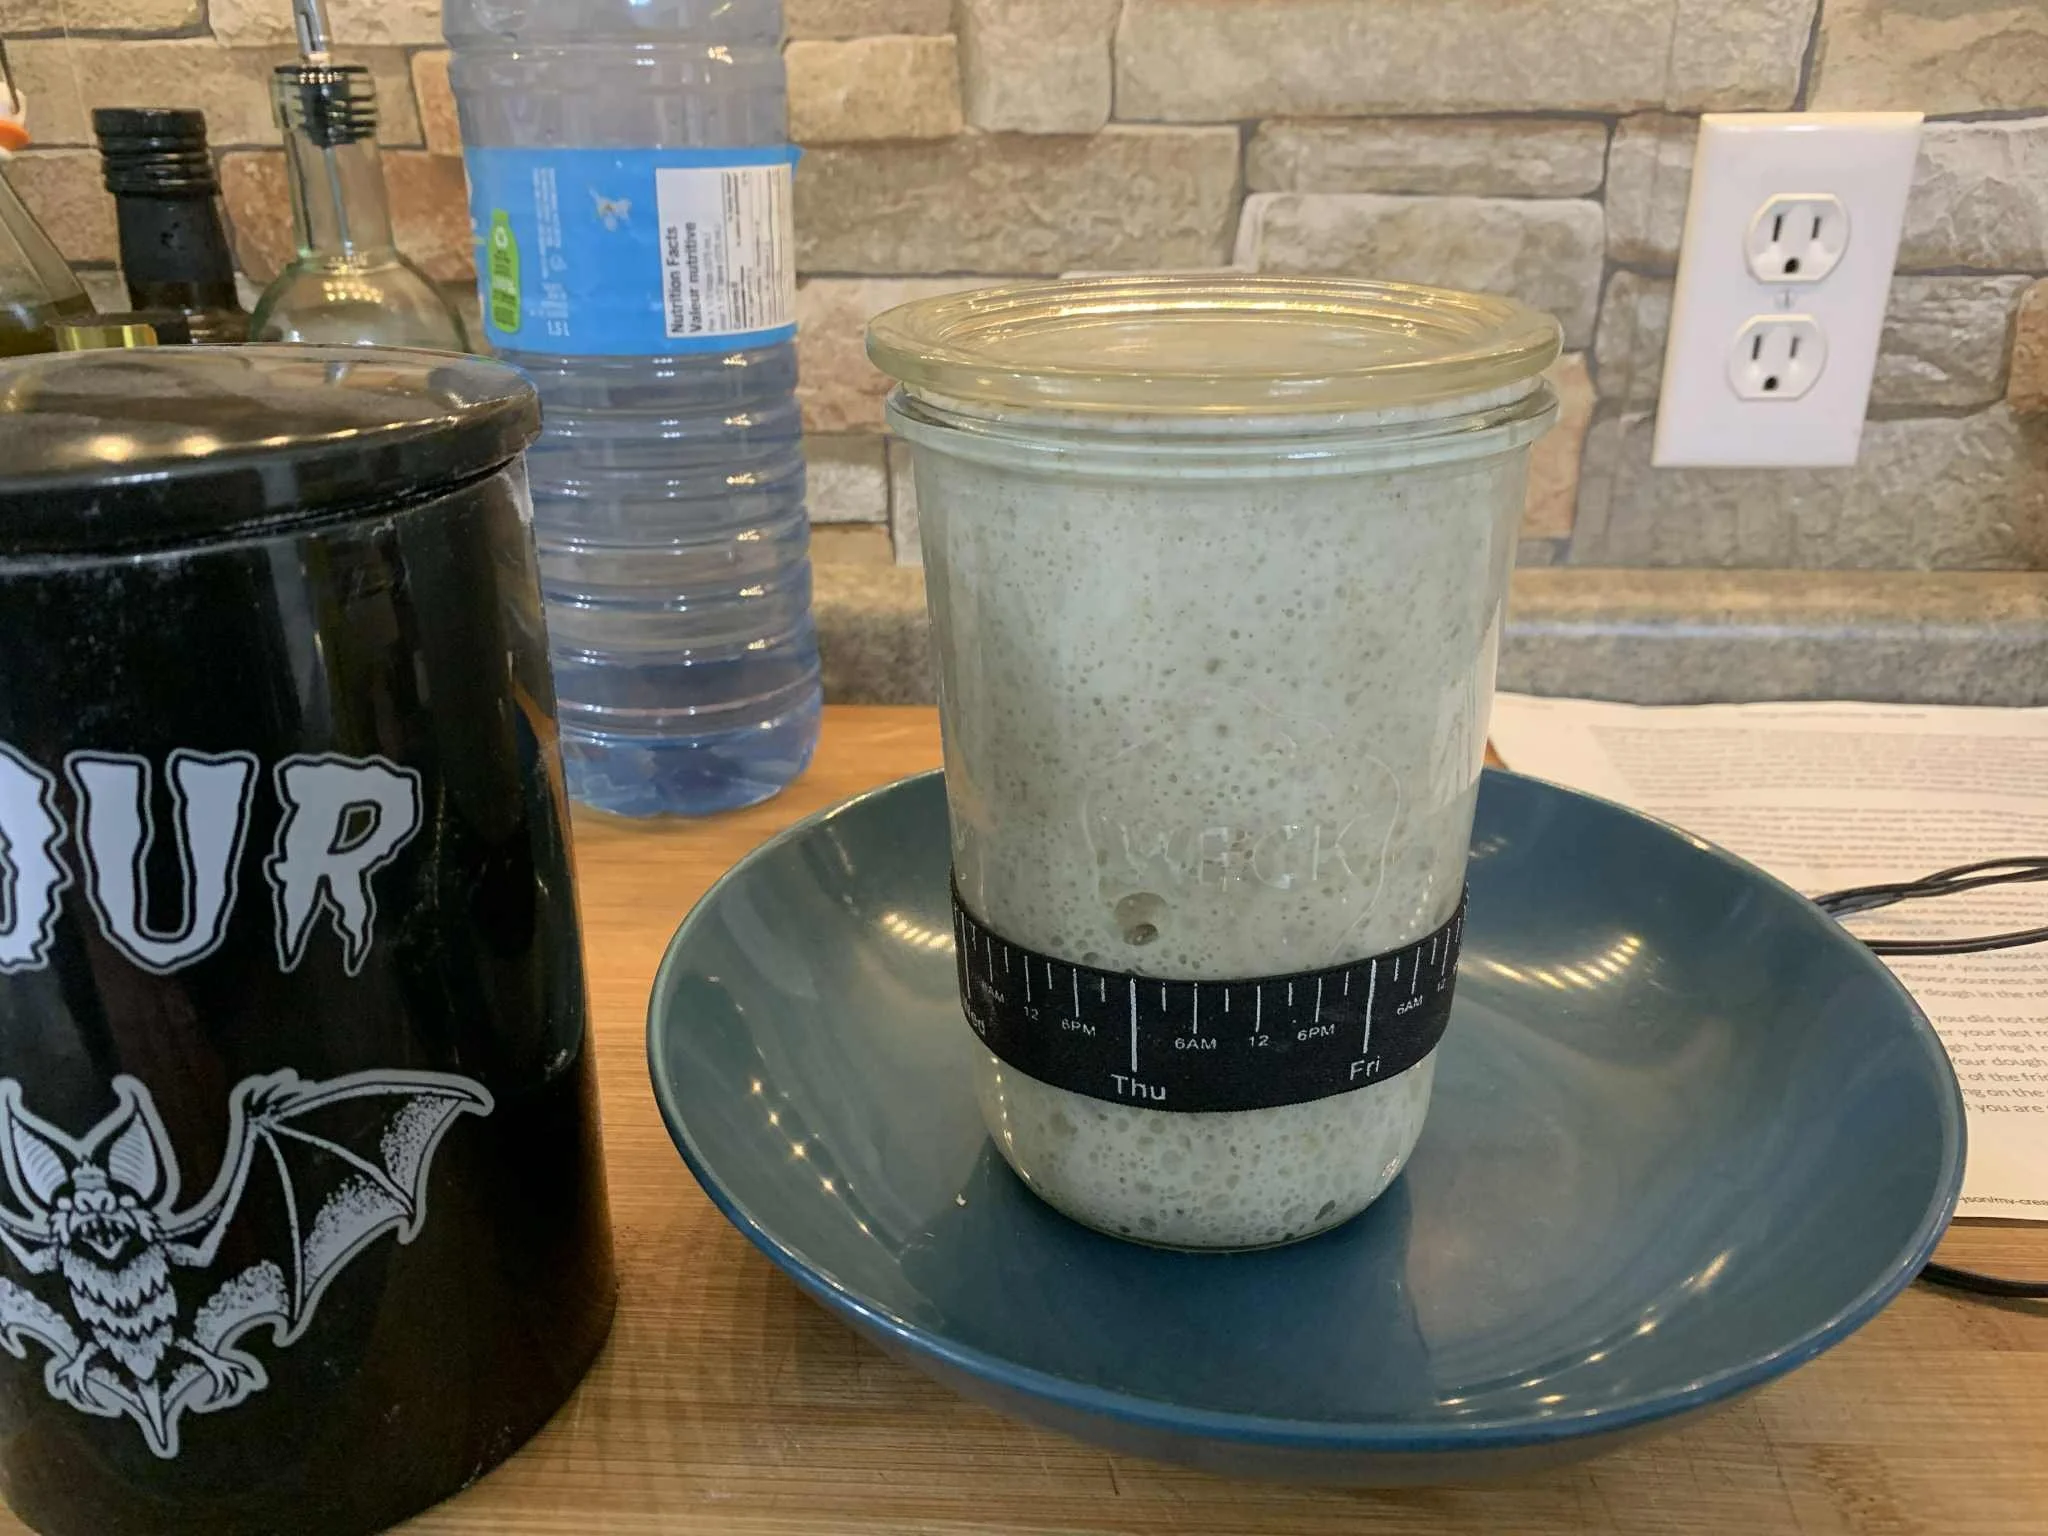
Bulk Fermentation
Bulk Fermentation: The initial stage of fermentation on the dough. This is where the dough is allowed to rise as a single mass after mixing. This is the most challenging stage to conquer as this is where things can go wrong, which is why it’s important to learn to read the dough not the clock
During the bulk fermentation stage is where the yeasts & beneficial bacteria start to develop the flavor, strength & overall volume of the dough. This stage can take several hours at room temperature to complete.
We don’t want to rush this stage as this is what determines the final crumb of the loaf.
If you end up over proofing the dough your best bet will be to make a focaccia by following these directions
Grease a cast iron skillet or small sheet pan with olive oil
Press the dough into an even layer in the pan
Add herbs & toppings. Think sweet or savory.
Wet your fingers & dimple the dough.
Drizzle with 3-4 Tbsp of olive oil
Preheat oven to 425F & bake for 20-25 minutes. It will be ready when crust is golden brown & internal temperature is 205-210F
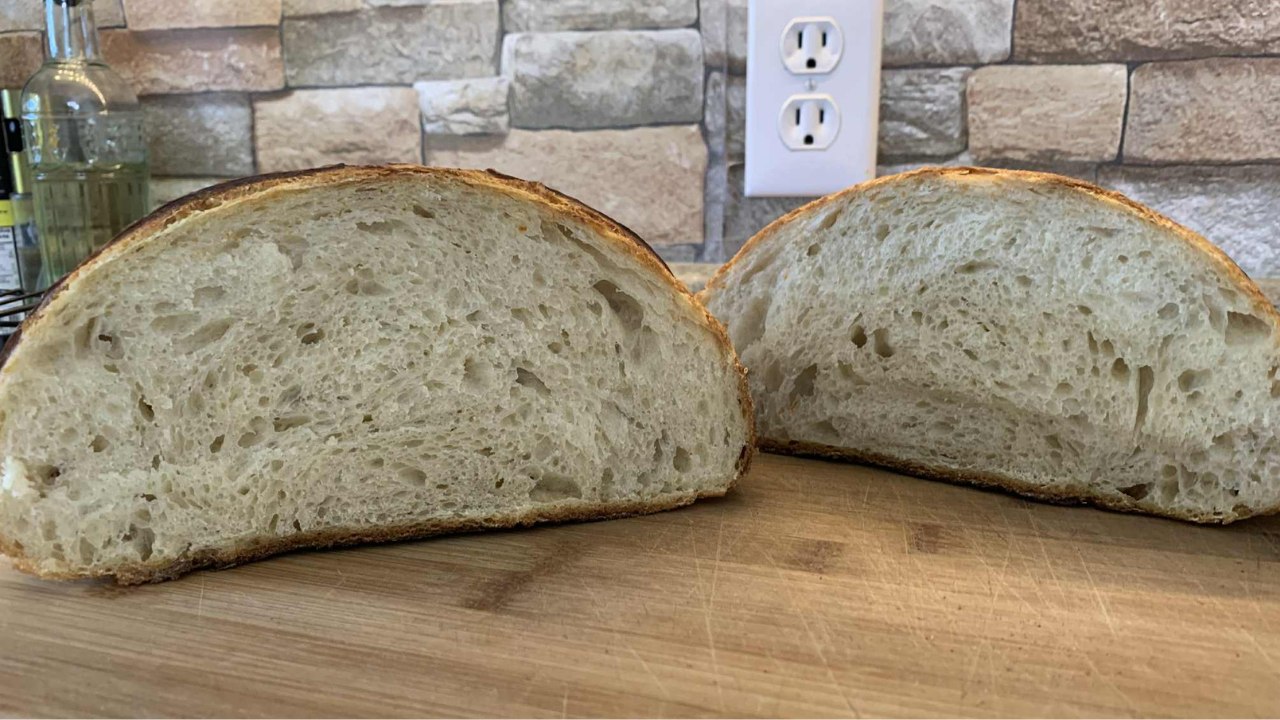
Crumb
Crumb: The texture & structure of the interior of the loaf. It can be either open crumb with large even holes which is a sign of good fermentation & handling or closed crumb which has a denser texture with fewer air pockets.
Levain
Levain: A levain is a single use leavening agent used for baking bread. Our levain is a mixture of sourdough starter, flour & water. Some levains contain a small amount of sugar making them sweet levains but we will get into that in another video
A levain does differ slightly from a sourdough starter, which is a mixture of wild yeast & beneficial bacteria that is made up of water & flour. The difference comes down to the intended usage as a levain is single use & a starter can be discarded, refreshed & essentially kept indefinitely with proper care. Some people even claim to have starters that are over 100 years old!
Autolyse & Fermentolyse
Autolyse: Autolyse occurs when we mix together flour & water then allow it to rest so the water can fully hydrate the flour. The reason we do this is because different flours absorb water differently. The temperature of your room, flour, water & starter once you add it all play a factor in this as well.
During this phase of the process certain enzymatic activity increases & some enzymes begin to bread down the gluten & proteins easier thus creating a more expendable dough while other enzymes break down starches into sugars which the wild yeasts will feed off of during the fermentation process
Is it necessary? I don’t know. I’ve seen recipes that call for this step & others that don’t. I’ve personally noticed my loaves turn out & taste better when I follow this step. Feel free to play around with this technique & see what happens to your loaves
You can autolyse dough for at least 30 minutes up to 12 hours depending on the recipe
Fermentolyse: Fermentolyse is a resting dough stage when the levain is mixed with water & flour but no salt, that’s added later. Once salt is added it starts to strengthen the gluten & slows down fermentation.
This process can help kickstart the fermentation process but keep in mind it is possible to have too much of a good thing
If you are going to use this process make sure that you don’t fermentolyse for longer than 30 minutes as it MAY result in over-proofing once bulk fermentation is complete.
I’ve personally never used this technique, I prefer the autolyse process but try it out & see what works best for you, your ambient temperature & your time
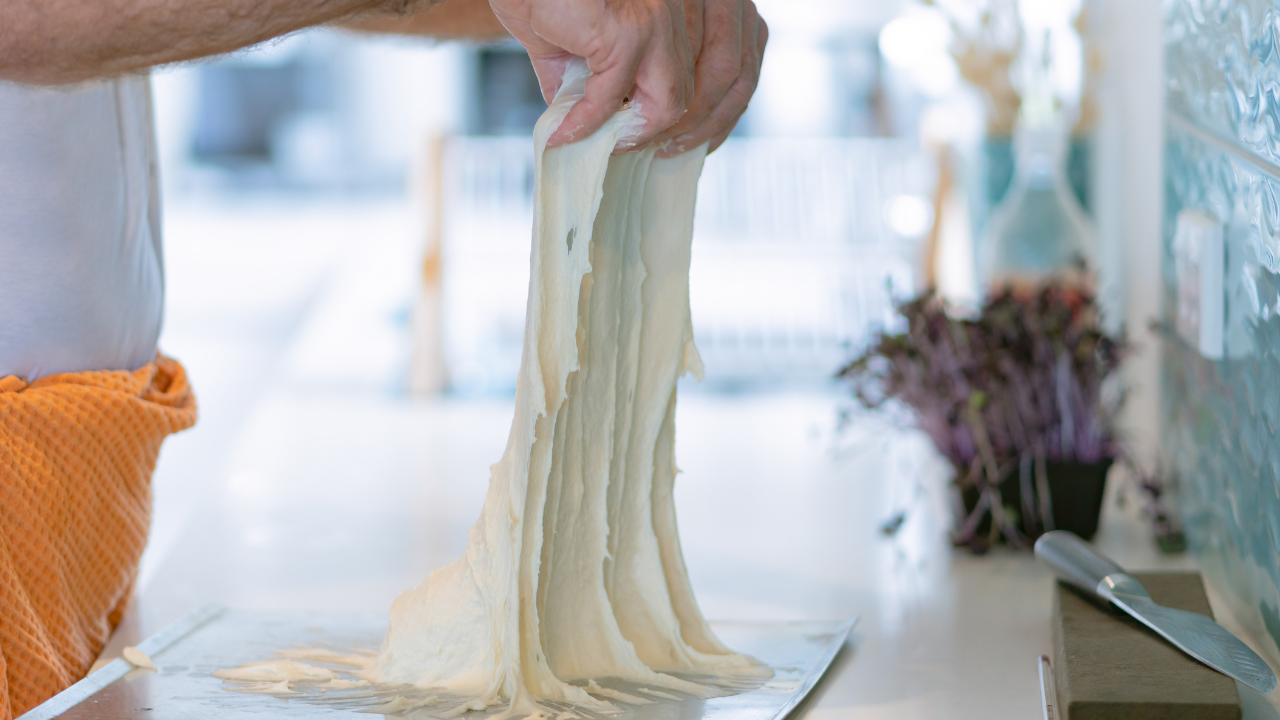
Slap & Folds, Stretch & Folds, Coil Folds
Slap & Folds: Also called the French Fold which is a technique for kneading wet dough to build gluten strength. It can be done after the initial mixing but before bulk fermentation. It involves slapping & folding the dough against the counter or bowl
Stretch & Folds: This process helps to strengthen the dough, equalize dough temperature & is a good way to check the progress as well as trap air in the dough. It involves stretching & folding the dough upon itself. Typically we do 3-4 sets, each with 4 folds in each direction by turning the bowl a quarter turn after each stretch & fold
Coil Folds: A strengthening motion used to develop gluten during the bulk fermentation stage. This is a good technique to use with high hydration doughs or any recipe that is needing some more gluten development. This is a way to help build surface tension & is considered to be a very gentle way to handle the dough

Water choices
I know that this isn’t necessarily a term but it is something important to consider as we do have a few different water sources available to us
Tap water. Leaving the water on the counter for 24-48 with no lid will allow any chlorine to evaporate but won’t do much for other contaminants that might be in the water. You could boil it & allow it to cool to reduce contaminants if tap water is all you have to use
Spring water. This water is typically it is mineral rich & free from harmful chemicals
Filtered water. This water can be bottled or just use a pitcher with a filter on your tap water
Well water. This may or may not work well depending on what minerals are present in the water. You will need to test your water & see if it’s helpful or hindering your loaf depending on what minerals are present.
I personally live in a trailer park that is on well water & since I’ve made the switch from spring water to well water my loaves are responding beautifully & deliciously.
The type of water you do not want to use is one treated by reverse osmosis or distilled as they are lacking the essential minerals found in other types of water.
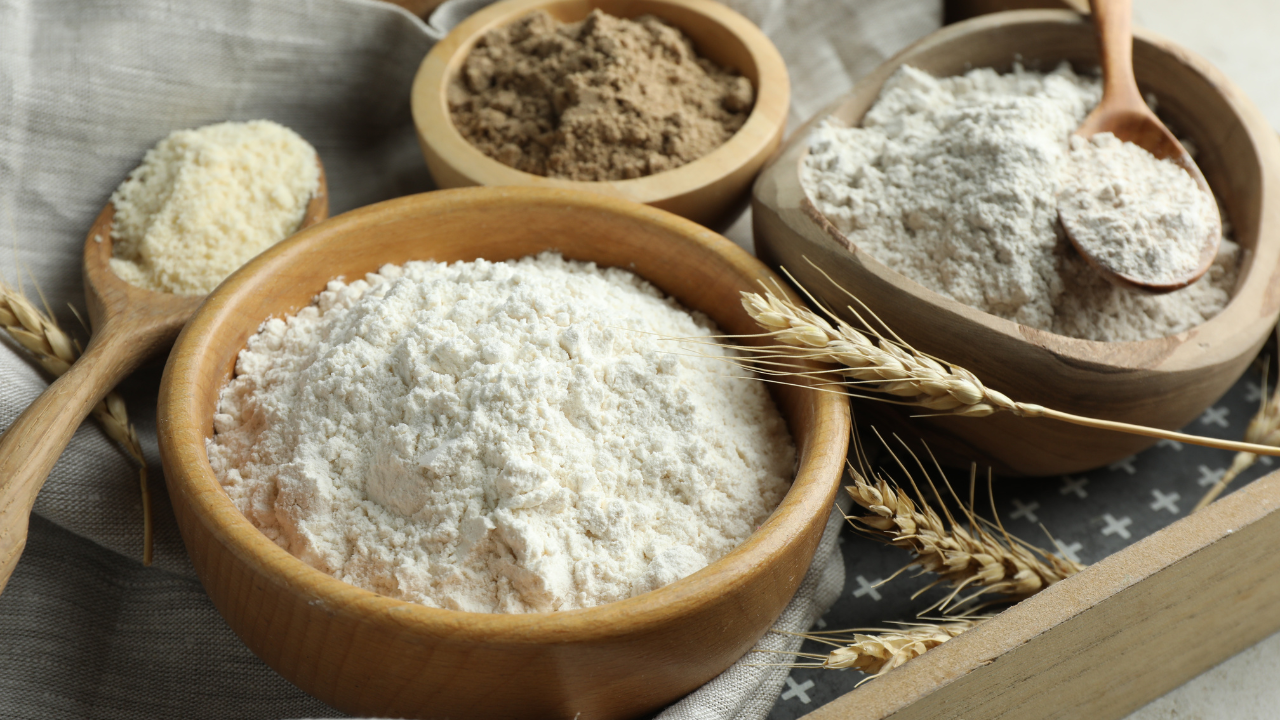
Types of Flour
This recipe uses only white bread flour. I don’t suggest starting with whole wheat or rye flours just yet as they do act differently & I will be sharing recipes with more information about different types of flours in future posts. For now I suggest sticking with either all-purpose or bread flour.
You do want to find a bread flour that has the highest protein content you can find. I’ve seen recommendations of 10-12% protein. The one I use has 4g of protein per 30g serving which means the protein content will be somewhere between 11-15%
I’m going to suggest you aim to use the highest quality flour you can afford. So this means if the best flour you can find & afford happens to be all organic stone ground by a monk in Peru beside a sacred stream at the foot of a pyramid, use that flour. If the best you can afford is the generic grocery store brand, use that flour.
I’ve noticed that some of us have become ingredient snobs only using all organic ingredients all the time while looking down on those who choose to eat non-organic. Let’s not worry too much about what another person is choosing to use ingredient wise for their family, especially if you’re never going to be consuming it yourself.
Once you become a more seasoned baker you could experiment with other flours such as:
Whole wheat flour. This ferments quicker than all purpose as it contains more nutrients. It is high in fiber & has a robust flavor
Rye flour. This speeds up fermentation as well. It creates a deep flavored loaf
Kamut or Einkorn. These ancient wheats have less gluten than all purpose flour with an increased flavor
Spelt. This flour is sweet, nutty & easy to digest
Oats. In the form of rolled oats or oat flour it will add more body & moisture to the loaf
If you do plan on eventually venturing onto other flours some things to keep in mind when working with any whole grains
Start low & slow. Begin with 25-50% whole grain with the rest being white or bread flour
Hydrate more. These flours absorb more water so be prepared to add an additional 10-15% hydration
Rest longer. Try extending the autolyse & bulk fermentation process to give the bran in the flour more time to soften
Bakers Notes
This isn’t really a term, it's more of a tool you can use to help you become a better baker. It isn’t necessary but it is quite useful & helpful. It helps you figure out what really works & what doesn’t. Feel free to come up with your own if you don’t want to use mine, a pen & paper work just as well
My loaves have gotten progressively better & consistent when I use these notes.
Beginners Guide to Baking Sourdough Bread
I’m going to share some of the equipment you will require & some suggestions on things you can use instead. If you have different suggestions feel free to share it in the comment section & let’s help each other out.
I don’t believe we need the best of the best equipment to do anything, just use what you have or have available to you.
Not everything is necessary but some of this stuff is helpful. Get creative, nobody is telling you that you need to go out & purchase a bunch of equipment to bake bread.
Equipment:
Kitchen scale. This is non-negotiable as we are going to be working in weights not measurements
Bowl or container for mixing. If it’s clear, even better, but not necessary. I’ve seen people mix their dough is Rubbermaid containers
Danish whisk or dough whisk. You can also just use your hands to mix
Bench scraper. You can also use a metal spatula
Bowl scraper. You can also use a plastic spatula, or anything that will get the flour bits or dough off the side of the bowl
Bread lame or knife for scoring
Banneton or a colander/bowl lined with a clean dish towel
Dutch oven or baking vessel. I do prefer cast iron but you can use enamaled if you want to, you may just need to adjust the time & temperature of the bake
Shower cap or cling wrap
Silicone bread sling or parchment paper
Cooling rack
Good quality oven mitts
Flour duster or your fingers
Digital thermometer
Ingredients:
10 g of active starter
1100 g of bread flour separated - 100 for the levain & 1000 for the loaf
760g of water separated - 100 for the levain & 660 for the loaf
20g salt
Optional: rice flour for sprinkling on loaf once in the proofing baskets use ap if you don’t have rice flour
Instructions:
The night before you want to bake make the levain as it will require 10-12 hours to peak.
Mix 10g of active starter with 100 g of flour & 100g of water until no dry flour remains
Leave in a warm spot for 10-12 hours
We are using a 1:10:10 ratio meaning we have 10 times as much flour & water than starter. This ratio will give your starter more time to go through the flour & water than a 1:1:1 ratio
Keep in mind that if your room & ingredients are on the warmer side this will happen faster, if it’s on the cooler side it will slow things down.
Autolyse, mixing 1000g of flour to 600g of water until no dry flour remains
Cover & wait 30 minutes to 1 hour
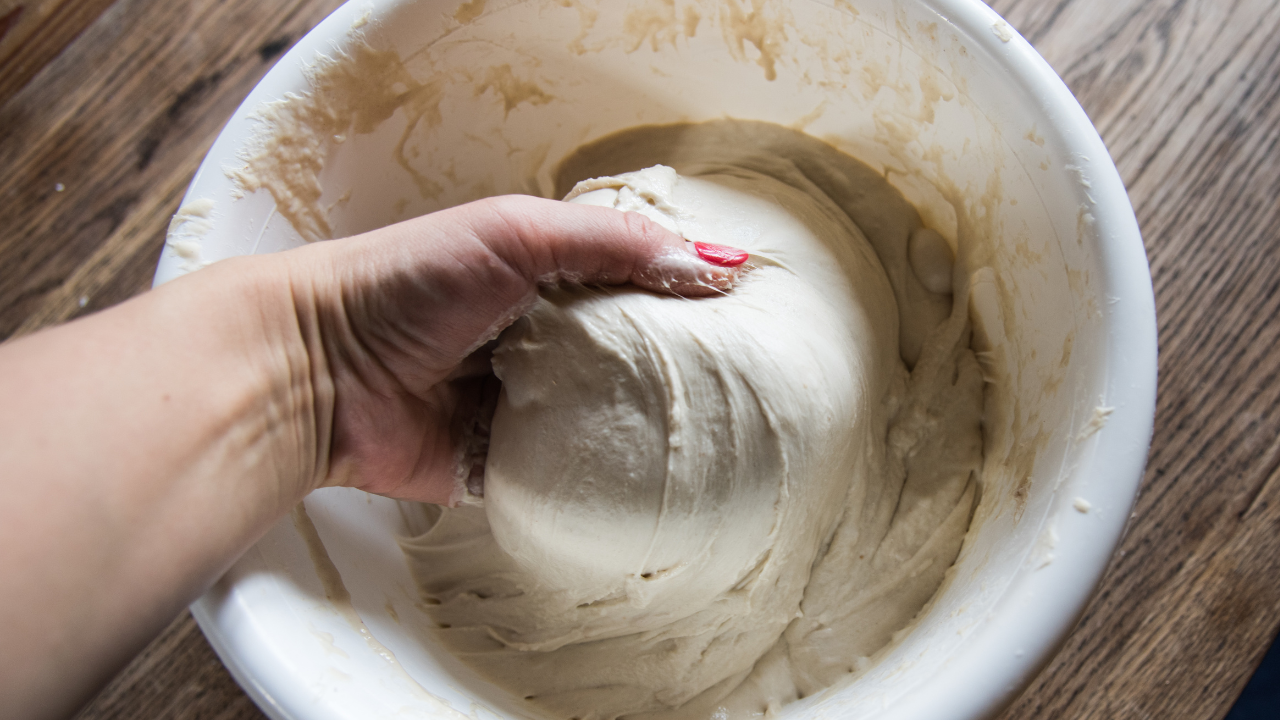
To the same bowl add 20g of salt, 30g of water & all of the levain & mix until fully incorporated
Strengthen the dough by folding the mixture over itself for 5 minutes
Determine if you need to add the remaining 30g of water. My house is typically at about 50% humidity. Put a cover over the bowl
Set 2 timers. Begin timing bulk fermentation, we’re aiming for at least 4 hours but I’ve had it take as long as 7 hours. THis has to do with the ambient temperature of your house & the temperature of the dough itself. Being aware of your desired dough temperature will help make bulk fermentation more predictable Other timer for 30 minutes
Start the first set of stretch & folds after 30 minutes. Cover
Second set of s & f after 60 minutes. Cover
Third set of s & f after 90 minutes. Cover
Fourth set of s & f after 2 hours. Cover
Leave the bowl alone for the remaining 2 hours & observe the dough. If it’s airy, jiggly, slightly domed & risen proceed. If not, leave it alone for another 30 minutes & observe again.
Once bulk fermentation is done pre-shape the dough & bench rest for 30 minutes.
Shape your dough & place into a floured banneton. You can use regular flour or rice flour
Cover bannetons & place in the fridge overnight
Preheat dutch oven at 450F for 30-40 minutes
Flip out the banneton onto a piece of parchment paper or onto a silicone sling
Score the bread to control where the steam is released. If you don’t score the bread you may burst the side out
Remove the dutch oven from the oven & carefully place the sling in the dutch oven, cover & put in the oven for 20 minutes
Remove the lid & bake for an additional 30-35 minutes, until browned & crisped
Allow the bread to cool for 1 to 2 hours. We’ve spent 3 days baking this, we can wait until it's cooled off.
Notes & Suggestions:
As tempting as it will be to make all of the recipes I am going to suggest you stick with one recipe & make that a few times before moving onto the next. Really get to know the recipe & I find this is the best way to do so.
The ambient temperature will make a difference. Know the temperature of your room & all ingredients. You can manipulate things by heating up the water if the room is too cold
Always go by the dough not the clock
Learn how to read the dough during bulk fermentation. Grab a copy of the chart below
Learn how to read the crumb. Grab a copy of the chart below. I did not come up with this chart, it originally came from a Reddit thread but I find it really helpful.
Use bakers notes to help monitor your improvements
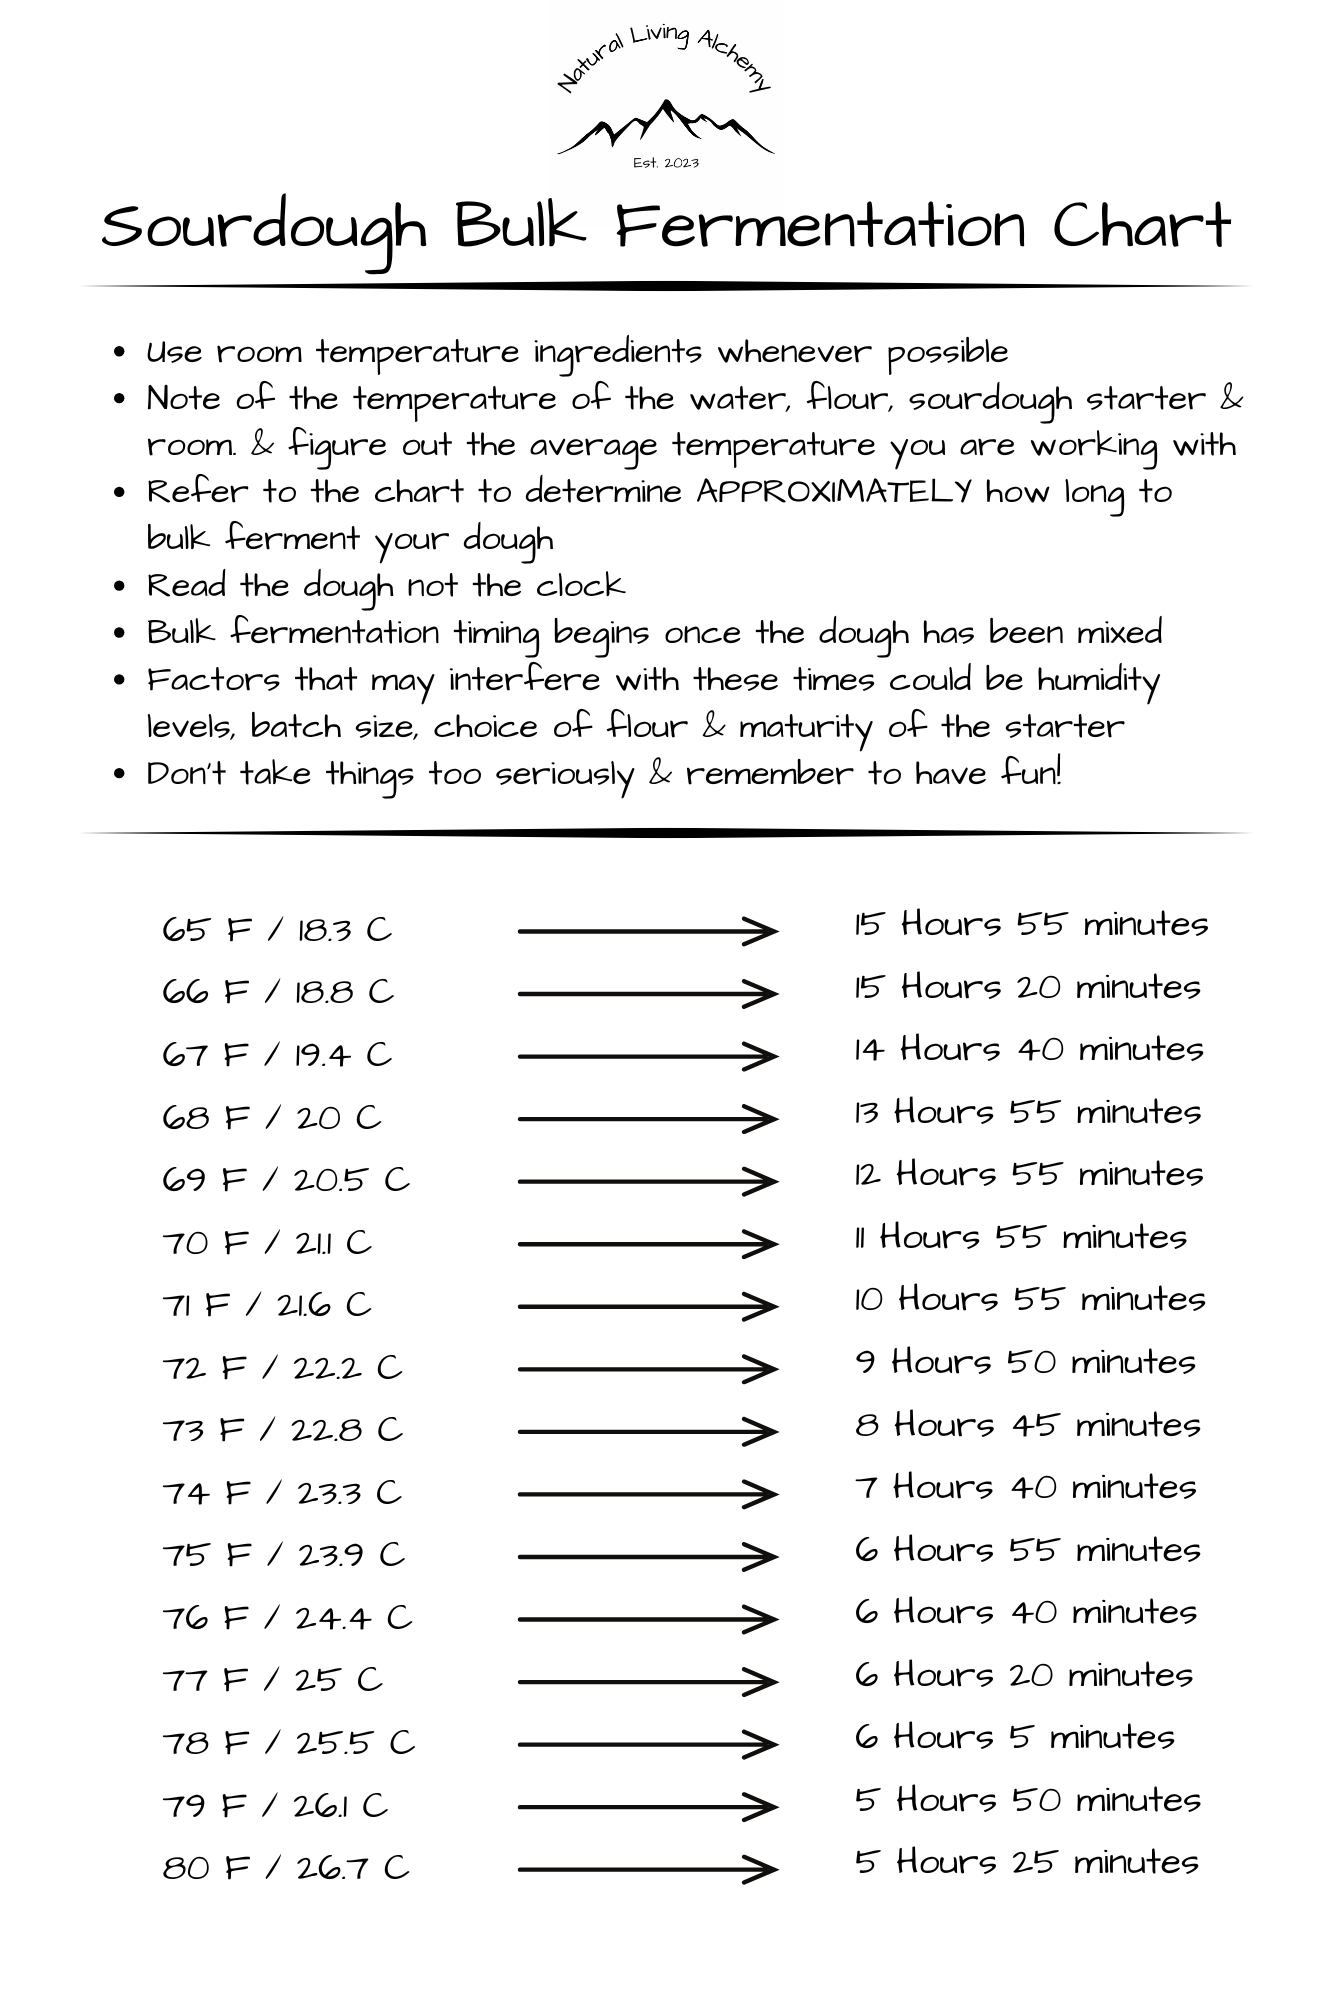
Image of Sourdough Bulk Fermentation Chart
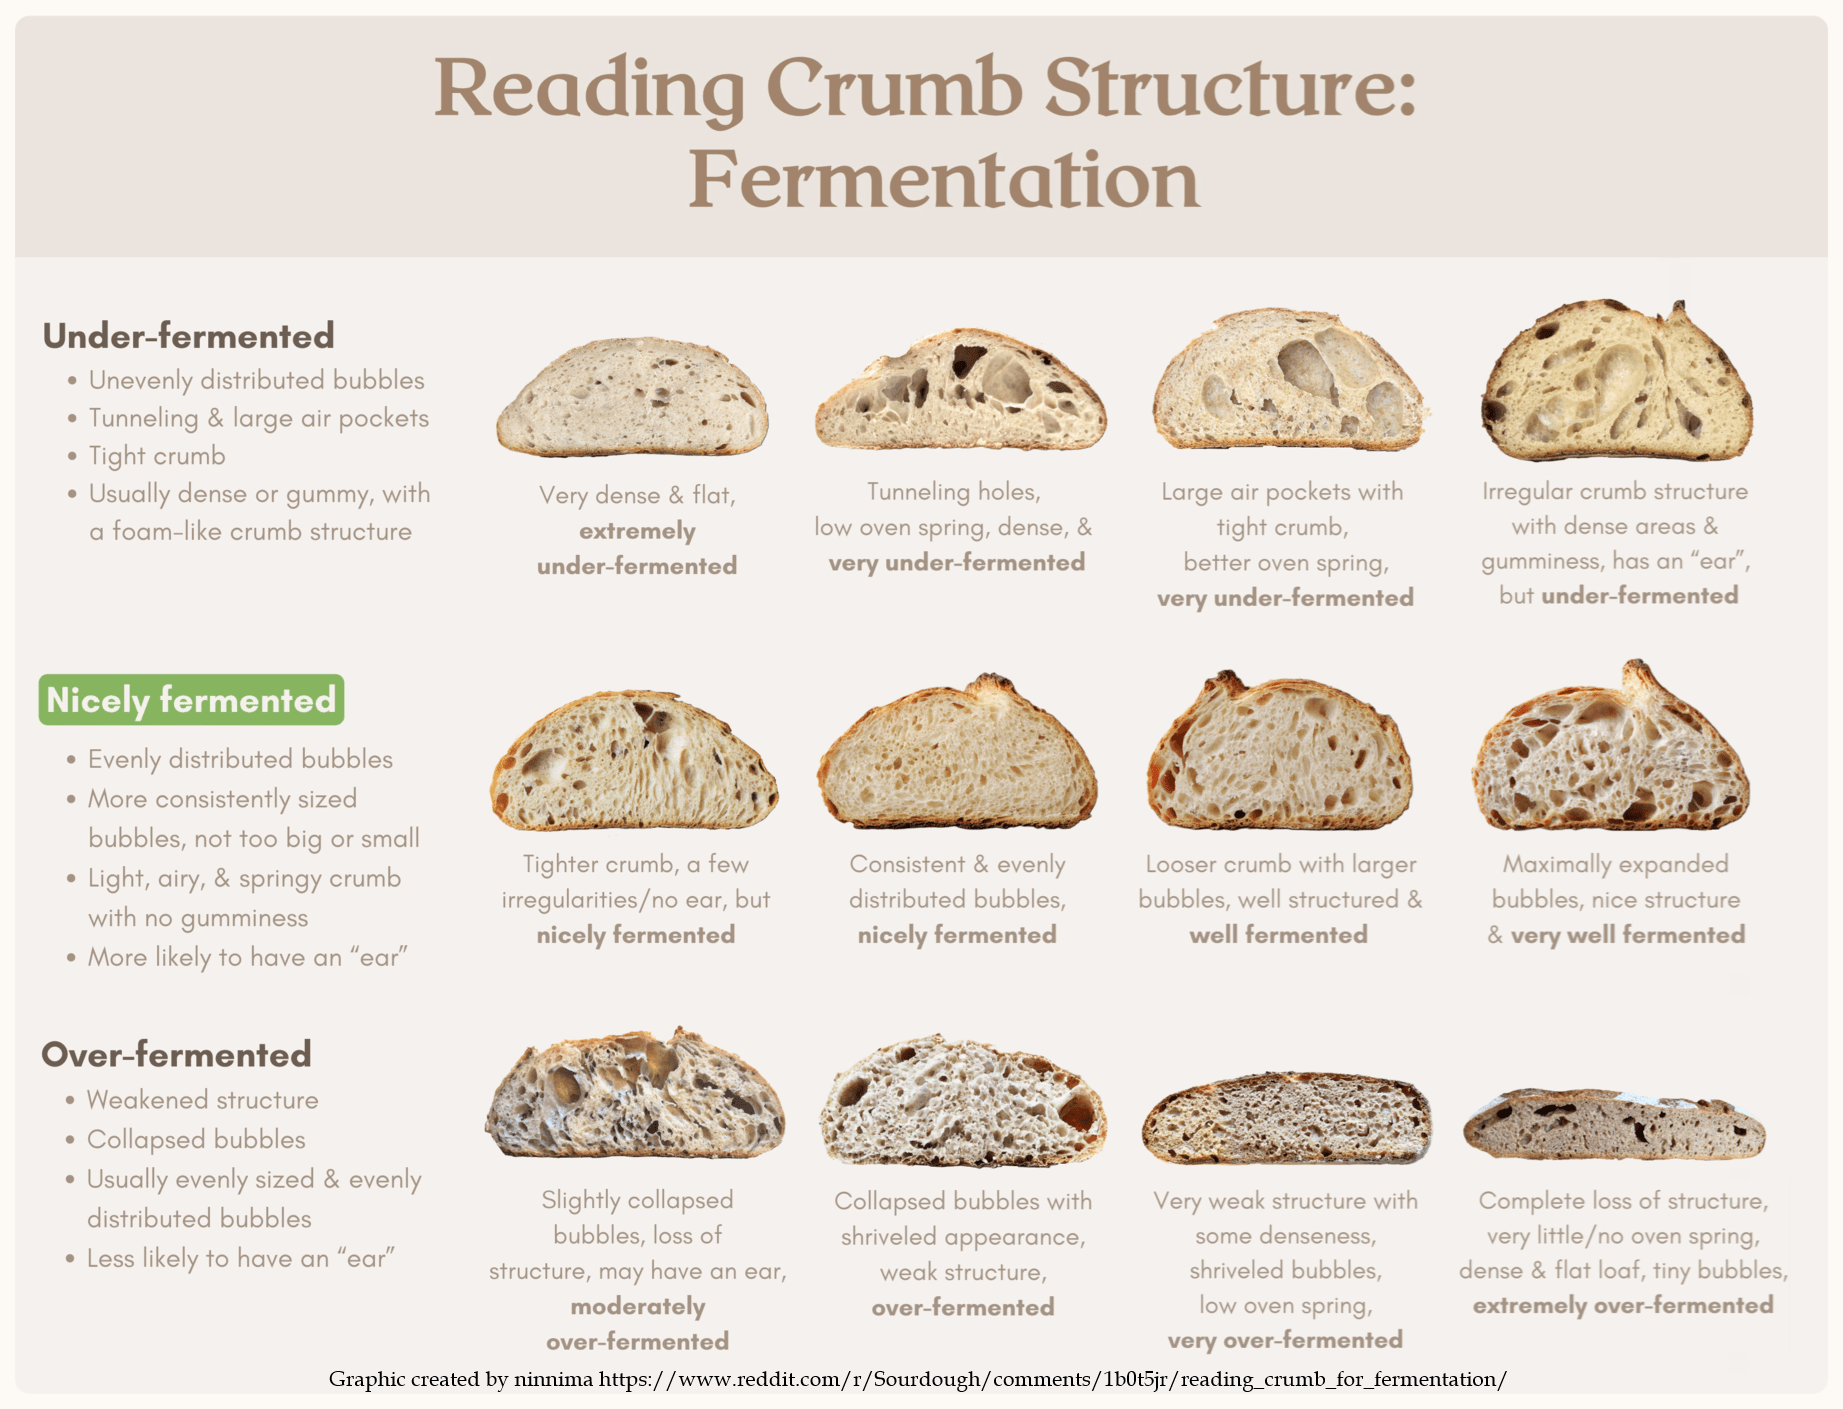
Image of Sourdough Crumb Structure Chart
Comment down below & let me know what other types of Sourdough bread are you interested in making?
Until next time, may you find Peace wherever you are!
Watch the video & tutorial HERE
Image of linked YouTube thumbnail
Sources:
https://riseandsourdough.com/sourdough-science/what-type-of-water-to-use-for-sourdough/
https://www.theperfectloaf.com/what-is-a-levain-and-how-is-it-different-from-a-starter/
https://sourdoughbrandon.com/autolyse/
https://thesourdoughjourney.com/faq-autolyse-fermentolyse/
https://www.reddit.com/r/Sourdough/comments/1b0t5jr/reading_crumb_for_fermentation/
https://gardenofmirth.com/how-to-make-focaccia-with-overproofed-sourdough-bread/#recipe