
Homemade Yogurt
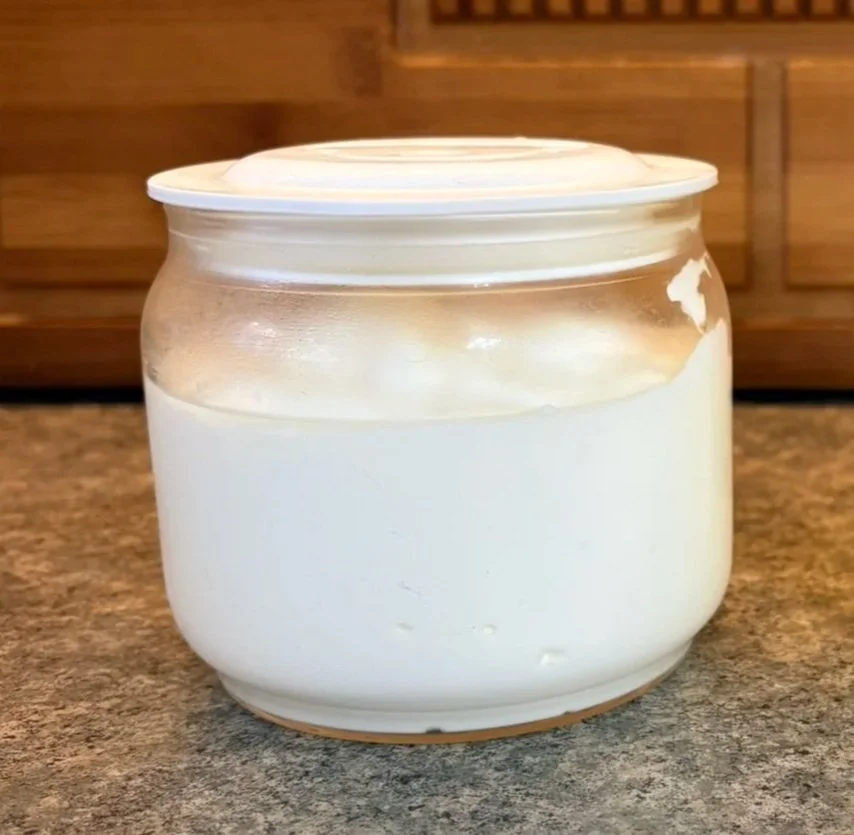
In this post we are going to be making homemade yogurt
Never buy yogurt again!
Homemade Yogurt
This post may contain links but they are not affiliate links. I am not in any sort of affiliate program at this time. They are links to things I actually use. All formulations shared on this blog have been formulated for personal use only, not for resale.
I am not a Doctor & none of this is medical advice. It is here for entertainment & educational purposes only & it is up to you to talk to your health care practitioners first. The information shared is not intended as a substitute for professional advice. Always consult a qualified health care provider before making any health decisions
Today we’re going to talk about the process of making homemade yogurt. I will be covering things like starter cultures, types of milk to use, how to prepare your milk, thickening options, ways to flavor your yogurt & then share our recipe.
For equipment you are going to need a yogurt maker, an instant pot with yogurt function or some other way you can hold the temperature of the yogurt as it incubates between 110-115F or 43-46C.
Other options that are common to use are heated seed mats, food dehydrator or the light in the oven. If you are going to be using the oven with a light on be sure to let everyone else in the house know to not turn the oven on while you’re incubating your yogurt. Allowing it to sit in the oven overnight might be a good idea. A crockpot set to “warm” would probably also work
Starter Cultures
The first thing we will need to talk about are starter cultures & when it comes to culturing dairy we have two different options, mesophilic & thermophilic, but only one will make yogurt
Both cultures can be found in the grocery store & sometimes you can find them in their powered form at a health food store on online retailer
Our mesophilic cultures thrive at room temperature & need to start at about 75F or 24C. These are the cultures we find in store bought buttermilk
Our thermophilic cultures need additional heat & must stay at a temperature around 115F or 43C during the incubation process. These cultures can be found in store bought yogurt but the only ingredients they can have are milk & live cultures. No additional sweeteners or thickeners. Try to find organic grass fed if possible
One really neat thing about both types of starter cultures is you can use your previous batch to culture your next batch as long as your previous batch is less than 7 days old. If it is older than 7 days I would suggest starting over just to ensure no unwanted microbes may have made their way into your culture.
If you are planning on using your previous culture to culture your next batch you need to make sure you aren’t adding any additional sweeteners or thickeners.
Types of Milk
You can use any milk that comes from a mammal, with common ones being cow, goat or sheep. Each of these types of milk will have a specific flavor profile.
The milk you choose can be any fat content but the higher the fat content, the creamier the yogurt will be. However you could always follow one of the thickening options if you only want to use skim milk
The milk can be raw or pasteurized, but will need to be re-pasteurized before you add in your cultures. With that being said you do want to avoid ultra pasteurized milk as that won’t give you the results you are expecting
Another milk option would be non-dairy milks but they will need to be thickened with some added sugar to help feed the cultures.
To Prepare the Milk
Unless you are using a non-dairy option we will be putting our milk through a pasteurization process, even if it’s already been pasteurized.
The reason for this is we are wanting to ensure that there are no unwanted bacteria left in the milk as well as denature some of the whey proteins allowing them to bind with the casein proteins creating a stable network that results in a thicker yogurt with less whey separation
For this step you will need to make sure you have a thermometer, we can’t just guess at what the temperature is.
To pasteurize our milk we will need to raise it to a temperature of 180F or 85C. You can hold it here for a few minutes or up to 30 minutes. The longer you allow it to stay at this temperature the texture will improve while creating a thicker & creamier yogurt.
Once the milk has come to temperature & you’ve held it for your desired amount of time, you will need to cool it down to 110F or 43C. The easiest & quickest way to do this is by placing the vessel the milk is warming in, into a sink of cold water
You can use a heavy bottomed pot & pour the milk directly into it. Then placing the pot into the sink of water to cool
You can use an instant pot using the yogurt function to bring the milk up to temperature. Then place the pot into the sink of cool water
You can place a mason jar full of milk into a large stock pot with a clean cloth at the bottom so the jar is not sitting directly on the bottom of the pot. You will need to make sure there is enough water in the pot to come above the amount of milk in the mason jar. Then once the milk has come to temperature you can place the pot into the sink of cool water to bring the temperature down
Thickening Options
It is common for homemade yogurt to have a thinner consistency than store bought yogurt
The easiest way to thicken your yogurt is to drip it through a few layers of tightly woven cheesecloth until it reaches your preferred consistency. If you find you’ve dripped too much whey out, you can easily stir some back in
For every gallon of yogurt some other options are:
1 ¼ tsp gelatin. Sprinkle the gelatin into a small bowl & add 3 TBSP of newly pasteurized milk you prepared. Allow the mixture to sit for 3 minutes before thoroughly stirring it into the rest of your batch
¼ cup powdered milk. Place the powdered milk into a bowl & slowly add 1 cup of your newly pasteurized milk you prepared. Stir the mixture constantly until smooth then pour it into the batch through a fine mesh strainer to catch any potential lumps
1 drop rennet. Whisk the rennet directly into the batch of yogurt before incubating
Flavoring Options
Once your yogurt has finished culturing & dripping if that is the way you chose to thicken it allow it to set in the refrigerator before adding some flavoring
For every 2 cups of yogurt:
Add 3 TBSP of your preferred sweetener along with an extract, flavoring or stir in option like cut up pieces of fruit
Add 5 TBSP of homemade or store bought jam or jelly
Waiting to add flavoring to your yogurt after it's done incubating will ensure none of your ingredients will interfere with the incubation process.
However, there is almost always an exception to any rule. Vanilla is our exception. You can scrape out the seeds of a vanilla bean, use the grade A variety, placing the beans & the pod into 1 gallon of milk during pasteurization.
Once the milk has reached the appropriate temperature of 180F or 85C remove the pod. When the milk has cooled down to 110F or 43C you can stir in ¾ of honey. If you are only making a quart of yogurt, use 3 TBSP to ¼ cup of honey. This will create an extra sweet yogurt.
By adding the honey you will ensure that the beneficial bacteria have something good to feed off of, which will help the incubation process. You can not use this yogurt as your new starter culture, starter cultures have to be unsweetened & unflavored
If you want an extra tangy flavor increase the incubation time, adding 10-20 additional hours for a long slow fermentation.
If you want an extra rich yogurt, add 2 cups of heavy cream per 1 gallon of milk during the pasteurization process
Homemade Yogurt
Before we go over the recipe I want to quickly talk about the required equipment. If you do not have a piece of the recommended equipment but have something that would work in it’s place go ahead & use what you have
Recommended Equipment:
Thermometer
Heavy bottomed pot
Yogurt maker or instant pot with yogurt function
Whisk
Measuring cup
Ingredients:
To make 1 quart batch of yogurt
1 quart of Milk
2-4 TBSP of Store Bought Yogurt With Only Milk & Cultures OR 1 package of Powdered Starter Culture
To make 1 gallon worth of yogurt, multiply the above ingredients by 4
Instructions:
Pasteurize your milk by raising the temperature to 180F or 85C & holding for the desired amount of time then cool the milk to 110F or 43C
Once the milk is cooled either add the appropriate amount of approved store bought yogurt or follow the instructions on the powdered starter culture into whatever vessel you choose for incubation
Incubate the yogurt for 8-10 hours around 115F. There is a bit of science when it comes to making yogurt but it is also a bit of an art form. See what works best for you, these are just my recommendations. Incubating your yogurt at cooler temperatures below 110F or 43C allows for a gentle fermentation producing a smoother texture that may require a longer incubation time. Incubating your yogurt at warmer temperatures above 115F or 46C may harm your cultures potentially preventing fermentation creating a lumpy or grainy texture.
Once incubation is complete decide if you want to drip your yogurt through tightly woven cheesecloth to help thicken it up. If you do not want to drip your yogurt, place it in the refrigerator to cool & set. It will thicken as it cools down.
Once your yogurt is cool & set you can sweeten it if desired. Be sure to set aside some of this batch to use as a starter in your next batch before you add any flavorings
Shelf Life & Storage:
2 weeks in the refrigerator in an airtight container. Discard at the first sign of spoilage
Notes & Substitutions:
If you are using a previous batch to culture your next batch do so within 7 days for best results. This may mean making slightly smaller batches more often if you want to do a continuous culture
Comment down below & let me know how you plan on flavoring your next batch of yogurt.
Until next time, may you find Peace wherever you are!
Watch the video & tutorial HERE
Image of linked YouTube thumbnail